
June 23, 2020 - July 3, 2020
Event Rules[]
Event Time[]
- The Celebration event lasts a total of 11 days.
- Booth gameplay will be opened until Day 10, and other gameplay will not be affected until Day 11.
- Within two hours after the event is totally finished, ranking rewards will be sent out: Overall Booth Ranking & Celebration Pts Ranking rewards.
Main Story[]
- One stage per day of Main Story Plot will be opened during the Celebration.
- Each stage can be played through once, and if you don't pass you can enter it again.
- Each time you enter a Main Story you must spend one Play Ticket.
- You get 10 free Play Tickets per day. More tickets can be purchased in the item shop.
- Get amazing rewards via Main Story stages.
- Note: All monsters appearing in Celebration stages are immune to stuns, silences, and charms.
Booths[]
- During the Celebration, players can operate one booth.
- The food sold in booths are Celebration exclusive cuisines. For selling cuisine, you can get Celebration Tokens.
- Players must manually collect the profits from the previous day's booth operations.
- Each day player booths will be ranked according to the amount of Celebration Tokens obtained, and a corresponding reward will be issued.
- Players will also be ranked based on total Celebration Tokens received throughout the whole event, and rewards will be sent after the event ends via in-game mail.
Play Celebration[]
- Aside from the Main Story, players can also spend Play Tickets to play in other Celebration areas.
- The Celebration has 5 total areas, and each one will set off a different Side Story Plot. After collecting an area's entire Side Story, you can get a corresponding reward.
- Each time Play is chosen, one area will be randomly selected. You can also decide to spend a certain amount of Magic Crystals to select a new Play area.
- Each area has difficulty settings that go up to 20.
- After passing the current difficulty, you can unlock that area's next difficulty level. The higher the difficulty, the better the rewards you can receive. Different difficulty areas may trigger different Side Story lines, and it's possible that a Side Story will appear more than once in the same stage.
- If you choose to give up in the middle of a play chance, the Play Ticket you used will not be refunded, so we recommend choosing a suitable difficulty level to play.
- When passing a stage, aside from getting item rewards, players can also get a Challenge Pts reward. Players will be ranked based on total Challenge Pts received throughout the whole event, and rewards will be sent after the event ends via in-game mail.
- Note: All monsters appearing in Celebration stages are immune to stuns, silences, and charms.
Story[]
See Creation Chronicle Main Story and Side Story
Featured Food Souls[]
| Food Soul | How to get |
|---|---|
 Natto |
Earn 600,000 Celebration Points |
 Umeshu |
Exchange in Sip & Tipple (summon exchange Event) |
 Oden |
Toss 100 rings in Mystery Ring Toss |
Calculations[]
| Difficulty | Crystals Needed | ||||
|---|---|---|---|---|---|
| 600k pts | 750k pts | 850k pts | 950k pts | 1.1m pts | |
| 1 | 1,860 | 2,775 | 3,390 | 4,005 | 4,920 |
| 2 | 1,800 | 2,700 | 3,300 | 3,900 | 4,800 |
| 3 | 1,740 | 2,610 | 3,210 | 3,795 | 4,680 |
| 4 | 1,680 | 2,535 | 3,120 | 3,690 | 4,560 |
| 5 | 1,620 | 2,475 | 3,030 | 3,600 | 4,455 |
| 6 | 1,575 | 2,400 | 2,955 | 3,510 | 4,350 |
| 7 | 1,530 | 2,340 | 2,880 | 3,435 | 4,245 |
| 8 | 1,485 | 2,280 | 2,820 | 3,360 | 4,155 |
| 9 | 1,440 | 2,235 | 2,760 | 3,285 | 4,065 |
| 10 | 1,395 | 2,175 | 2,700 | 3,210 | 3,990 |
| 11 | 1,365 | 2,130 | 2,640 | 3,150 | 3,900 |
| 12 | 1,335 | 2,085 | 2,580 | 3,075 | 3,825 |
| 13 | 1,305 | 2,040 | 2,535 | 3,015 | 3,765 |
| 14 | 1,275 | 1,995 | 2,475 | 2,970 | 3,690 |
| 15 | 1,245 | 1,950 | 2,430 | 2,910 | 3,630 |
| 16 | 1,215 | 1,920 | 2,385 | 2,865 | 3,555 |
| 17 | 1,200 | 1,890 | 2,355 | 2,805 | 3,495 |
| 18 | 1,170 | 1,860 | 2,310 | 2,760 | 3,450 |
| 19 | 1,155 | 1,830 | 2,280 | 2,715 | 3,390 |
| 20 | 1,140 | 1,800 | 2,235 | 2,685 | 3,345 |
Event Items[]
- Play Tickets: Used for passing Main Story & Celebration stages: Hilena Campus Festival, Tamakyo Temple Fair, Lake of Ice Tears Carnival, Moonrise Festival, and Fireworks Show.
- Roundtrip Airship: Used for moving anywhere 6 spaces forward.
- Celebration Token: Used for playing Mystery Ring Toss or improving the mastery of your Booth's dish.
Stages[]
Main Story[]
| Play Tickets Consumed | Points Gained | Rewards |
|---|---|---|
| 1 | 5000 |
3000
|
Celebration Stages[]
Each Play Ticket will select a random Play Celebration map with a difficulty ranging from 1-20. Your highest difficulty depends on whether or not you were able to beat the map's boss successfully. For each difficulty, it increases by 50 Celebration Points and 20 Celebration Tokens.
Hilena Campus Festival |
Tamakyo Temple Fair |
Lake of Ice Tears Carnival |
Moonrise Festival |
Fireworks Show |


| Difficulty | Points Gained | Rewards |
|---|---|---|
| Lvl 1 | 2450 |
820
|
| Lvl 2 | 2500 |
840
|
| Lvl 3 | 2550 |
860
|
| Lvl 4 | 2600 |
880
|
| Lvl 5 | 2650 |
900
|
| Lvl 6 | 2700 |
920
|
| Lvl 7 | 2750 |
940
|
| Lvl 8 | 2800 |
960
|
| Lvl 9 | 2850 |
980
|
| Lvl 10 | 2900 |
1000
|
| Difficulty | Points Gained | Rewards |
|---|---|---|
| Lvl 11 | 2950 |
1020
|
| Lvl 12 | 3000 |
1040
|
| Lvl 13 | 3050 |
1060
|
| Lvl 14 | 3100 |
1080
|
| Lvl 15 | 3150 |
1100
|
| Lvl 16 | 3200 |
1120
|
| Lvl 17 | 3250 |
1140
|
| Lvl 18 | 3300 |
1160
|
| Lvl 19 | 3350 |
1180
|
| Lvl 20 | 3400 |
1200
|
Event Map[]
| Icon | Description |
|---|---|

|
Battle with mobs |

|
Unlock a side story for the Celebration Stage you're on. |

|
Obtain a random item. (Chance of getting Celebration Tokens, Crystals, Soul Embers, Gold, or Beginner's Seasoning) |

|
Throw the dice again and randomly move forwards or backwards. |

|
Spend crystals for items from the Black Market |

|
Spend 500 Celebration Tokens to increase 1 out of 3 booth dishes by 50 Mastery pts. |
Strategy Tips[]
| Strength/Magic | Defender | ||||
|---|---|---|---|---|---|
| Utility | Damage | Damage | Damage | Damage | Mandatory for team survival |
| Fallen Angel | Speed or Attack | Speed or Attack | Speed or Attack | Speed or Attack | HP |
General Tips[]
- Healers should NOT be used; they will not be able to keep up the enemies' basic attack and AOE skills.
- Enemies are immune to CC (stun, charm, silence) so Food Souls that do CC but contribute low damage should be avoided.
- You MUST kill fast! Battles are impractical to drag out due to the barrage of dangerous AOE attacks.
- Some bosses are easier than others. Most players find Aizen to be the easier and Orochi to be the hardest to clear.
- Different bosses have different gimmicks so be open to trying different team compositions and Cooking Talents for each boss.
Defender[]
- The Defender you bring must be as high HP as possible and capable of surviving enemy skill damage.
- As for how much HP your best Defender should have in general:
- ~9,000 HP to clear stage 50 Catacombs
- ~15,000 HP to clear Palata normal story stages
- ~20,000 HP to clear stage 80 Catacombs
- If your Defender options are limited, is your friend, especially if you invested R Artifact Tickets for him.
- With decent artifact progression, Tom Yum will outperform even 5* SR and 2* UR Defenders.
- In general, tanks with defensive skills should be used over cc/offensive skills, assuming similar stats.

")
")
")
")
")
")
")
")
Magic/Strength[]
1. Players will have various options across the board, depending on the UR ranking events participated and luck in limited banners. You will have to experiment to see what works best for you. Refer to the Useful Food Souls guide as a reference for which Food Souls are viable to use.
2. Food Souls that do CC (stun, charm, silence) but deals little to no damage should be avoided
- ❌ - 0 damage on basic skill
- ❌ - 0 damage on basic skill
- ❌ - horrendous base attack


3. These CC Food Souls are okay to use purely for damage but should not be top priority; many players likely have better options.
- ? , ,


4. Food Souls with skills that target all of, the backmost, or random enemies may prove to be more helpful in taking down the more dangerous mobs faster. Some notable examples:
- All enemies - , , , ,
- Backmost - ,


5. Food Souls that have slaying effect on their skills maybe also be helpful to finish off enemies quickly.
- % HP same regardless of level - , ,
- Needs lvl 21/31 energy skill level - , ,
- Other options such as are not considered due to poor damage contribution


6. Enemy dispel can be used to get rid of status buff and/or invincibility on some of the bosses. However, this may not be fully necessary depending on the damage output of your team without one.
Basic Skill Enemy Dispel
")
")
")
")
")
")
")
Artifact Skill Enemy Dispel
")
")
")
")
")
Healers[]
- Most players should not be bringing a Healer to battle. If healing is needed, they should be supplemented with Cooking Talents instead.
- The battles are simply a damage race. It is a matter of killing it before it kills you. Dedicating a team slot for a healer will lower team damage output and make it impossible or far too RNG dependent to clear
- There are exceptions
- - high random target damage helps to take down dangerous mobs
- Artifact-dependent options that should only be sought by advanced players

| Support | ||
|---|---|---|
| Skill | Recommend? | Explanation |
 Melt & Mold |
✅ | Necessary for the team to survive past the boss skill damage that will wipe most of your team |
 Seasoning |
✅ | Helpful to keep the Defender alive |
 Divine Seasoning |
✅ | If timed right, the team can survive past AOE attacks for some of the bosses |
 Zero Degrees |
? | May help with surviving some AOE bursts from the boss, but the timing required may be too precise and farming-unfriendly |
 Always Fresh |
❌ | Invincibility duration too short considering the continuous damage the Defender will be receiving |
 Precise Seasoning |
❌ | Heal % far too little considering the energy cost and cooldown |
 Keep Fresh |
❌ | A terrible skill. Don't bother with it |
| Damage | ||
|---|---|---|
| Skill | Recommend? | Explanation |
 Super Dark Cuisine |
✅ | Decent source of damage for those whose team may be struggling with damage output. |
 Blade Chop |
❌ | Skill only helps towards the end of battle. Damage without slaying effect is insignificant |
 Cross Cut |
❌ | Damage inflicted is insultingly low |
 Grilled Purgatory |
❌ | Energy cost far too high to use reliably since battles are relatively short |
| Control | ||
|---|---|---|
| Skill | Recommend? | Explanation |
 Clean N Scrub |
? | May help against invincibility shields and enemy skill buffs. Likely better to bring a dedicated dispeller. |
 Up Damage |
❌ | Duration far too short considering the boost % and energy cost |
 Restore Energy |
❌ | Energy cost far too high to properly take advantage of |
 Up Defense |
❌ | Please don't |
 Holy Mushroom |
❌ | Enemies are immune to CC so this skill is useless |
 Hot Pan |
❌ | Enemies are immune to CC so this skill is useless |
 Titanium Pan |
❌ | Enemies are immune to CC so this skill is useless |
Booth[]
Event Cuisine[]
- The food sold in booths are Celebration exclusive cuisines. For selling cuisine, you can get Celebration Tokens.
- There are a total of 10 different cuisines, each with an initial Proficiency of 0. Event cuisine Proficiency can be increased by purchasing cookbooks from the Cookbook Merchant when encountered during Play Celebration.
- Proficiency max limit is 1000.
| Food | |||
|---|---|---|---|
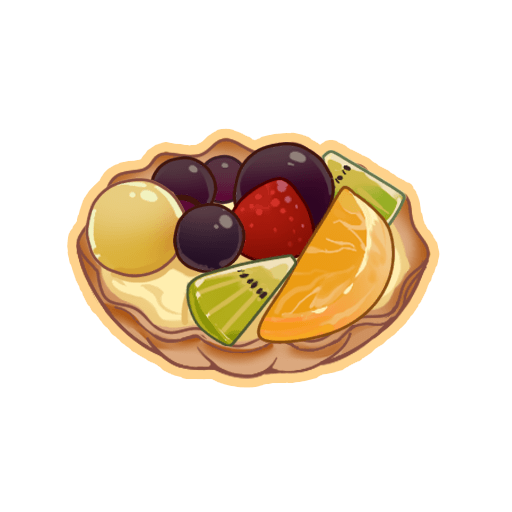
| Fruit Tart | Mapo Tofu | ||
|

| ||
| Type | Dessert | Type | Dish |
| Origin | Unknown | Origin | China |
| Invented in | Unknown | Invented in | 19th century |
| Description | A Western dessert that you can add whatever ingredients you like to. | Description | A traditional dish of Sichuan. |
| Appearance | Comes in a rich and enticing assortment of dazzling colors. | Appearance | That spicy, fiery red hue makes it a dish that folks just can’t say no to. |
| Orange Juice | Dorayaki | ||

|

| ||
| Type | Beverage | Type | Dessert |
| Origin | Unkown | Origin | Japan |
| Invented in | Modern | Invented in | 17th ~ 19th century |
| Description | Fresh and full of nutrients, with a tartly-sweet flavor that is unforgettable. | Description | Doraemon’s favorite food. |
| Appearance | A golden-orange gourmet beverage, even better server ice-cold! | Appearance | A sweet filling sandwiched between two round layers of honey cake-like crust. |
| Sandwich | Almond Tofu | ||

|

| ||
| Type | Fast Food | Type | Desserts |
| Origin | England | Origin | China |
| Invented in | 18th century | Invented in | Unknown |
| Description | Legend says this was invented by an earl who was too engrossed in his card game to stop and eat. | Description | An excellent summertime dessert, and also found at a full formal Chinese banquet. |
| Appearance | A food item made with all kinds of ingredients stuffed between two pieces of bread. Some people say using a bread roll or a flour wrap also count! | Appearance | Looks like tofu, with a cool, sweet, refreshing taste, perfect for beating the heat. Can also be garnished with fruit. |
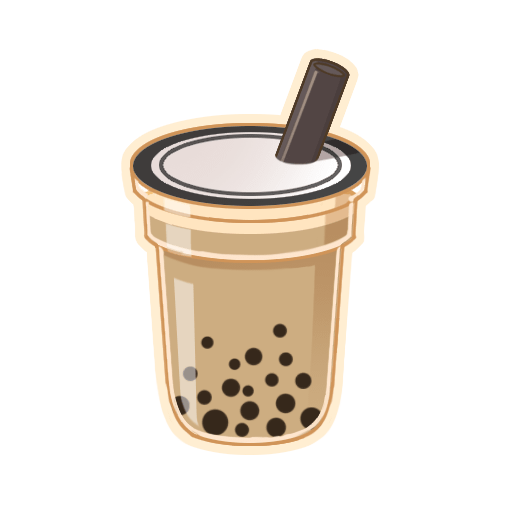
| Milk Tea | Takoyaki | ||
|

| ||
| Type | Beverages | Type | Refreshments |
| Origin | Southeast Region | Origin | Japan |
| Invented in | 20th century | Invented in | 20th century |
| Description | A high-calorie drink which is both the boon and bane of many a young woman’s existence. | Description | Both crispy and tender, this delicious and cheap delicacy is a beloved snack food throughout Japan. |
| Appearance | Hidden in milky-white liquid seems to be many shiny black pearls. | Appearance | What deliciousness is contained within these round little balls? |
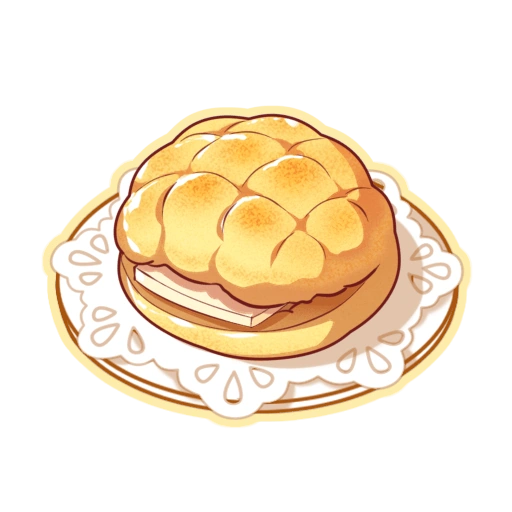
| Pineapple Bun | Marshmallow | ||
|
| ||
| Type | Refreshments | Type | Dessert |
| Origin | China/Hong Kong | Origin | France |
| Invented in | 20th century | Invented in | 19th century |
| Description | A very common sight in tea houses. Even better with a coffee or milk tea! | Description | Soft sugary sweets that come in all kinds of flavors and colors. A favorite of children. |
| Appearance | A cold pat of butter placed into a freshly-baked bread bun makes for an intensely flavorful experience! | Appearance | Puffy and airy, with a bit of bounce and resiliency to them. Similar to a ball of cotton in terms of texture and consistency. |
Preparation Stage[]
- Each day from 00:00 to 20:00 UTC is Booth prep time.
- During prep time, players can set the Food Soul in charge of selling and the cuisine to be sold for the Booth that day. During prep time, players may repeatedly adjust Booth settings. When setting the cuisine to be sold, you can set the sale price, which will affect the cuisine's odds of selling. Higher Proficiency cuisine will sell for a higher price more easily.
- Some Food Souls have event exclusive operations skills that can help increase operating profits.
| Skills | ||
|---|---|---|
| Name | Skill | Food Souls |
| File:Skill-Almond Tofu Sale Rate Boost.png Almond Tofu Sale Rate Boost |
In operations phase, increases almond tofu's sale success rate 10% |  |
 All Dishes Sale Rate Boost |
In operations phase, increases sale success rate of all dishes 10% |  |
| File:Skill-Dorayaki Sale Rate Boost.png Dorayaki Sale Rate Boost |
In operations phase, increases dorayaki's sale success rate 10% |  |
| File:Skill-Fruit Tart Sale Rate Boost.png Fruit Tart Sale Rate Boost |
In operations phase, increases fruit tart's sale success rate 10% |  |
| File:Skill-Marshmallow Sale Rate Boost.png Marshmallow Sale Rate Boost |
In operations phase, increases marshmallow's sale success rate 10% |  |
| File:Skill-Mapo Tofu Sale Rate Boost.png Mapo Tofu Sale Rate Boost |
In operations phase, increases mapo tofu's sale success rate 10% |  |
| File:Skill-Milk Tea Sale Rate Boost.png Milk Tea Sale Rate Boost |
In operations phase, increases milk tea's sale success rate 10% |  |
| File:Skill-Orange Juice Sale Rate Boost.png Orange Juice Sale Rate Boost |
In operations phase, increases orange Juice's sale success rate 10% |  |
| File:Skill-Pineapple Bun Sale Rate Boost.png Pineapple Bun Sale Rate Boost |
In operations phase, increases pineapple Bun's sale success rate 10% |  |
| File:Skill-Sandwich Sale Rate Boost.png Sandwich Sale Rate Boost |
In operations phase, increases sandwich's sale success rate 10% |  |
| File:Skill-Takoyaki Sale Rate Boost.png Takoyaki Sale Rate Boost |
In operations phase, increases takoyaki's sale success rate 10% |  |
 Profit Boost |
During each sale event, cuisine has a 10% chance of getting an extra 5 Celebration Token(s) |           |
 Increase Hourly Customers |
In operations phase, increases customer flow per hour by 12 |                         |
Operations Stage[]
- Each day from 20:00-24:00 UTC is Booth operations stage. During this stage, you can no longer adjust Booth settings.
- Profits will be tallied once per hour during the operations stage. After the operations stage ends, players can go to their Booth to collect their profits.
- By operating a Booth, players can get Celebration Tokens, which can be used for the Celebration's Mystery Ring Toss.
- During the event, players will be ranked according to the amount of Celebration Tokens obtained from Booth operations, and rewards will be sent out via in-game mail.
Recommended Cuisine[]
- During the event, each day there will be a recommended cuisine which will get a bonus 10% sale rate boost in Booths for that day (max sale rate is 100%).
- Recommended cuisine info is hidden by default, and one clue will be unlocked each day at 10:00, 12:00, 14:00, 16:00, and 18:00 UTC. When the Operations Stage begins at 20:00 UTC, that day's recommended cuisine will be announced publicly.
- The recommended cuisine for each day will not repeat.
| Day | Recommended Cuisine | |
|---|---|---|
| 1 | Fruit Tart |
|
| 2 | Pineapple Bun |
|
| 3 | Mapo Tofu |
|
| 4 | Marshmallow |
|
| 5 | Milk Tea |
|
| Day | Recommended Cuisine | |
|---|---|---|
| 6 | Takoyaki |
|
| 7 | Almond Tofu |
|
| 8 | Sandwich |
|
| 9 | Orange Juice |
|
| 10 | Dorayaki |
|
Rewards[]
Mystery Ring Toss[]
| Total Exchange Reward | |
|---|---|
| 100 Total Rings Tossed | |
| Special Rewards | ||||
|---|---|---|---|---|
8
|
6
| |||
| 1.97% | 2.81% | |||
| Normal Rewards | ||||
1
|
3
|
1
|
5
|
10
|
| 5.61% | 2.81% | 2.81% | 7.01% | 7.01% |
20,000
|
10,000
|
2
|
1
|
2
|
| 7.01% | 7.01% | 4.21% | 7.01% | 7.01% |
1
|
2
|
1
|
2
|
1
|
| 4.21% | 4.21% | 7.01% | 4.21% | 7.01% |
5
|
3
|
|||
| 4.21% | 7.01% | |||
Story Collection Rewards[]
Note: Celebration Crystals are used to get puzzles pieces for event-limited illustrations in Food Soul Memory.
| Condition | Rewards |
|---|---|
| Complete Main Story |
300
|
| Hilena Campus Festival Story Full Collections |  |
| Tamakyo Temple Fair Story Full Collections |  |
| Lake of Ice Tears Carnival Story Full Collections |  |
| Moonrise Festival Story Full Collections |  |
| Fireworks Story Full Collections |  |
Celebration Point Milestones[]
| Points Gained | Rewards |
|---|---|
| 5,000 |
150
2,000
10,000
|
| 20,000 |
300
8,000
100000
|
| 100,000 |
450
15,000
200000
|
| 300,000 |
750
20,000
400000
|
| 600,000 |
20
20
 |
| 750,000 |
15
5
|
| 850,000 |
50
10
1
|
| 950,000 |
150
30
 |
| 1,100,000 |
35
10
1
|
Black Market[]
For every Mystery Shop space you land on, you will get the chance to buy one of the three options available for sale. Cost for certain items may change.
| Miscellaneous | |
|---|---|
| Crystal Cost (Lowest) |
Item |
350
|
1
|
30
|
1
|
150
|
5
|
80
|
150
|
150
|
300
|
30000
|
10
|
30000
|
10
|
30000
|
10
|
6
|
1
|
30
|
5
|
60
|
10
|
| Artifact Ticket | |
|---|---|
| Crystal Cost (Lowest) |
Item |
6
|
1
|
30
|
5
|
60
|
10
|
24
|
1
|
120
|
5
|
240
|
10
|
96
|
1
|
480
|
5
|
960
|
10
|
| Togi Grabber | |
|---|---|
| Crystal Cost (Lowest) |
Item |
27
|
1
|
135
|
5
|
270
|
10
|
7
|
1
|
35
|
5
|
70
|
10
|
Rankings[]
Daily Food Stall Ranking[]
| Rank | Rewards |
|---|---|
| Rainbow (<1%) |
3
150
|
| Orange (1%-3%) |
3
130
|
| Topaz (3%-10%) |
3
110
|
| Green (10%-15%) |
3
90
|
| Navy (15%-20%) |
3
75
|
| Indigo (20%-30%) |
3
60
|
| Purple (30%-50%) |
3
45
|
| Gold (50%-70%) |
3
30
|
| Sunrise (70%-100%) |
3
15
|
Overall Food Stall Ranking[]
| Rank | Rewards |
|---|---|
| Honor Rainbow (<1%) |
355
150
3,000
 |
| Honor Orange (1%-3%) |
355
100
2,700
|
| Honor Topaz (3%-10%) |
225
80
2,400
|
| Honor Green (10%-15%) |
125
60
2,100
|
| Honor Navy (15%-20%) |
125
40
1,800
|
| Honor Indigo (20%-30%) |
50
25
1,500
|
| Honor Purple (30%-50%) |
50
10
1,200
|
| Honor Gold (50%-70%) |
15
900
|
| Honor Sunrise (70%-100%) |
15
600
|
Point Ranking[]
| Rank | Rewards |
|---|---|
| Glory Rainbow (<1%) | 
340
3000
|
| Glory Orange (1%-3%) |
340
20
2700
|
| Glory Topaz (3%-10%) |
190
15
2400
|
| Glory Green (10%-15%) |
80
12
2100
|
| Glory Navy (15%-20%) |
80
10
1800
|
| Glory Indigo (20%-30%) |
35
8
1500
|
| Glory Purple (30%-50%) |
35
6
1200
|
| Glory Gold (50%-70%) |
15
4
900
|
| Glory Sunrise (70%-100%) |
15
3
600
|
