mNo edit summary |
m (tweak) |
||
| (16 intermediate revisions by 3 users not shown) | |||
| Line 1: | Line 1: | ||
| + | [[File:Interface-Shards.png|100px|right]] |
||
| − | __NOTOC__ |
||
| + | '''Shard Fusion''' lets you fuse certain UR, SR and R [[Shards]] you get in order to obtain certain UR, SR and R shards (M shards cannot be obtained or used in fusion). There are two types of fusion: Rank-Up for shards of a higher rarity and Same Rank for shards of the same rarity. |
||
| − | '''Shard Fusion''' is your primary method of obtaining [[Food Souls|Food Soul]] shards aside from summoning. It is unlocked at player level 30. |
||
| + | Shard Fusion is unlocked at Player Level 30. You access it through Souls on the main screen. |
||
| − | ==Basics== |
||
| − | <center> |
||
| ⚫ | |||
| − | </center> |
||
| − | # The "Fusion" button on the top right of the Food Souls interface will be unlocked at player level 30. |
||
| − | # Tapping on it will open up the fusion interface. |
||
| − | # There are two types of fusion, '''Rank-Up''' and '''Same Rank'''. Rank-Up fusion will produce shards of a higher rarity than the shards fused, Same Rank fusion will produce shards of the same rarity. |
||
| + | Shards can be obtained through [[Summoning]], [[Airship]], [[Delivery]], [[Exploration]], [[Hard Stages]], [[Rebates]], the [[Restaurant Overview|Restaurant]], [[Team Up]], certain [[Shops]] and certain [[Events]] (see [[Shards]] and respective articles for details). |
||
| ⚫ | |||
| + | |||
| ⚫ | |||
| + | '''Note:''' Both types of fusion can give shards for the same Food Soul that the ones you used. |
||
| − | |colspan=2 style="border-bottom:1px solid #540c0c"| |
||
| + | [[File:Fusion 2.png|500px|center]] |
||
| ⚫ | |||
| + | |||
| ⚫ | |||
| ⚫ | |||
| + | Use Rank-Up to get shards of a higher rarity that the shards fused. |
||
| ⚫ | |||
| ⚫ | |||
|- |
|- |
||
| ⚫ | |||
| − | !rowspan=3|R |
||
| − | |class="secondaryheader"|Input |
||
| ⚫ | |||
| ⚫ | |||
|- |
|- |
||
| + | !style="width:25%:"|Shards Required |
||
| − | |class="secondaryheader"|Gold Req. |
||
| ⚫ | |||
| − | |5,000 [[File:Sprite-Gold.png|x20px|link=]] |
||
| ⚫ | |||
| − | |2,000 [[File:Sprite-Gold.png|x20px|link=]] |
||
|- |
|- |
||
| ⚫ | |||
| − | |class="secondaryheader" style="border-bottom:1px solid #540c0c"|Output |
||
| − | | style=" |
+ | |60% chance: <span style="color:orange;">'''UR Shard x1'''</span><br />40% chance: <span style="color:purple;">'''SR Shard x2'''</span> |
| + | |{{ItemCount|width = 45 px|tooltip = Gold|fontsize = 1.2em|number = 50,000|img=Sprite-Gold.png}} |
||
| − | | style="border-bottom:1px solid #540c0c; color:blue; font-weight:bold"|1 R Shard |
||
|- |
|- |
||
| ⚫ | |||
| − | !rowspan=3|SR |
||
| − | |class="secondaryheader"|Input |
||
| ⚫ | |||
| ⚫ | |||
|- |
|- |
||
| ⚫ | |||
| − | |class="secondaryheader"|Gold Req. |
||
| ⚫ | |||
| − | |50,000 [[File:Sprite-Gold.png|x20px|link=]] |
||
| + | |{{ItemCount|width = 45 px|tooltip = Gold|fontsize = 1.2em|number = 5,000|img=Sprite-Gold.png}} |
||
| − | |5,000 [[File:Sprite-Gold.png|x20px|link=]] |
||
| + | |} |
||
| + | |||
| + | ==='''Fusion Rates'''=== |
||
| + | Probabilities of getting certain shards, based on users' experience. |
||
| ⚫ | |||
| + | <center>[[File:SR.png|link=]] '''to''' [[File:UR.png|link=]]</center> |
||
| ⚫ | |||
| ⚫ | |||
| ⚫ | |||
| ⚫ | |||
| ⚫ | |||
| ⚫ | |||
| ⚫ | |||
| ⚫ | |||
| ⚫ | |||
| ⚫ | |||
| ⚫ | |||
| ⚫ | |||
| ⚫ | |||
| ⚫ | |||
| ⚫ | |||
| ⚫ | |||
| ⚫ | |||
| ⚫ | |||
| + | </gallery> |
||
| + | |||
| + | <center>[[File:R.png|link=]] '''to''' [[File:SR.png|link=]]</center> |
||
| + | <gallery orientation="square" widths="80" position="center" spacing="small" captionalign="center" captionsize="large" navigation="true" bordersize="none" bordercolor="none" hideaddbutton="true" columns="5"> |
||
| + | Escargot.png|link=Escargot|Escargot (10.45%) |
||
| + | Hamburger.png|link=Hamburger|Hamburger (10.89%) |
||
| + | Mango Pudding.png|link=Mango Pudding|Mango Pudding (11.57%) |
||
| + | Napoleon Cake.png|link=Napoleon Cake|Napoleon Cake (10.09%) |
||
| + | Pastel de Nata.png|link=Pastel de Nata|Pastel de Nata (11.29%) |
||
| + | Sweet Tofu.png|link=Sweet Tofu|Sweet Tofu (3.12%) |
||
| + | Tangyuan.png|link=Tangyuan|Tangyuan (9.68%) |
||
| + | Tiramisu.png|link=Tiramisu|Tiramisu (13.42%) |
||
| + | Wonton.png|link=Wonton|Wonton (11.93%) |
||
| + | </gallery> |
||
| + | |||
| + | =='''Same Rank'''== |
||
| + | Use Same Rank fusion to get shards of the same rarity that the shards fused. |
||
| + | ==='''Requirements'''=== |
||
| + | {| class="themedtable" style="width:100%; text-align: center;" |
||
|- |
|- |
||
| + | !colspan=3|[[File:UR.png|45px]] |
||
| − | |class="secondaryheader" style="border-bottom:1px solid #540c0c"|Output |
||
| − | | style="border-bottom:1px solid #540c0c"|60%: <span style="color:orange; font-weight:bold">1 UR Shard</span><br>40%: <span style="color:purple; font-weight:bold">2 SR Shards</span> |
||
| − | | style="border-bottom:1px solid #540c0c;color:purple; font-weight:bold"|1 SR Shard |
||
|- |
|- |
||
| + | !style="width:25%:"|Shards Required |
||
| − | !rowspan=3|UR |
||
| + | !style="width:25%:"|Results |
||
| − | |class="secondaryheader"|Input |
||
| + | !style="width:25%:"|Cost |
||
| − | |rowspan=3|- |
||
| ⚫ | |||
|- |
|- |
||
| ⚫ | |||
| − | |class="secondaryheader"|Gold Req. |
||
| ⚫ | |||
| − | |20,000 [[File:Sprite-Gold.png|x20px|link=]] |
||
| + | |{{ItemCount|width = 45 px|tooltip = Gold|fontsize = 1.2em|number = 20,000|img=Sprite-Gold.png}} |
||
|- |
|- |
||
| + | !colspan=3|[[File:SR.png|45px]] |
||
| − | |class="secondaryheader"|Output |
||
| ⚫ | |||
|- |
|- |
||
| + | |style="color:purple;"|'''SR shards x3''' |
||
| + | |style="color:purple;"|'''SR Shard x1''' |
||
| + | |{{ItemCount|width = 45 px|tooltip = Gold|fontsize = 1.2em|number = 5,000|img=Sprite-Gold.png}} |
||
| + | |- |
||
| + | !colspan=3|[[File:R.png|45px]] |
||
| + | |- |
||
| + | |style="color:blue;"|'''R shards x3''' |
||
| ⚫ | |||
| + | |{{ItemCount|width = 45 px|tooltip = Gold|fontsize = 1.2em|number = 2,000|img=Sprite-Gold.png}} |
||
|} |
|} |
||
| − | ===Notes=== |
||
| − | * M shards cannot be used in fusion. |
||
| − | ==Fusion Rates== |
+ | ==='''Fusion Rates'''=== |
| + | TBA |
||
| ⚫ | |||
| + | [[Category:Food Souls]] |
||
| − | |||
| ⚫ | |||
| ⚫ | |||
| ⚫ | |||
| ⚫ | |||
| ⚫ | |||
| ⚫ | |||
| ⚫ | |||
| ⚫ | |||
| ⚫ | |||
| ⚫ | |||
| ⚫ | |||
| ⚫ | |||
| ⚫ | |||
| ⚫ | |||
| ⚫ | |||
| ⚫ | |||
| ⚫ | |||
| ⚫ | |||
| ⚫ | |||
| ⚫ | |||
Revision as of 21:31, 17 April 2020

Shard Fusion lets you fuse certain UR, SR and R Shards you get in order to obtain certain UR, SR and R shards (M shards cannot be obtained or used in fusion). There are two types of fusion: Rank-Up for shards of a higher rarity and Same Rank for shards of the same rarity.
Shard Fusion is unlocked at Player Level 30. You access it through Souls on the main screen.
Shards can be obtained through Summoning, Airship, Delivery, Exploration, Hard Stages, Rebates, the Restaurant, Team Up, certain Shops and certain Events (see Shards and respective articles for details).
Note: Both types of fusion can give shards for the same Food Soul that the ones you used.
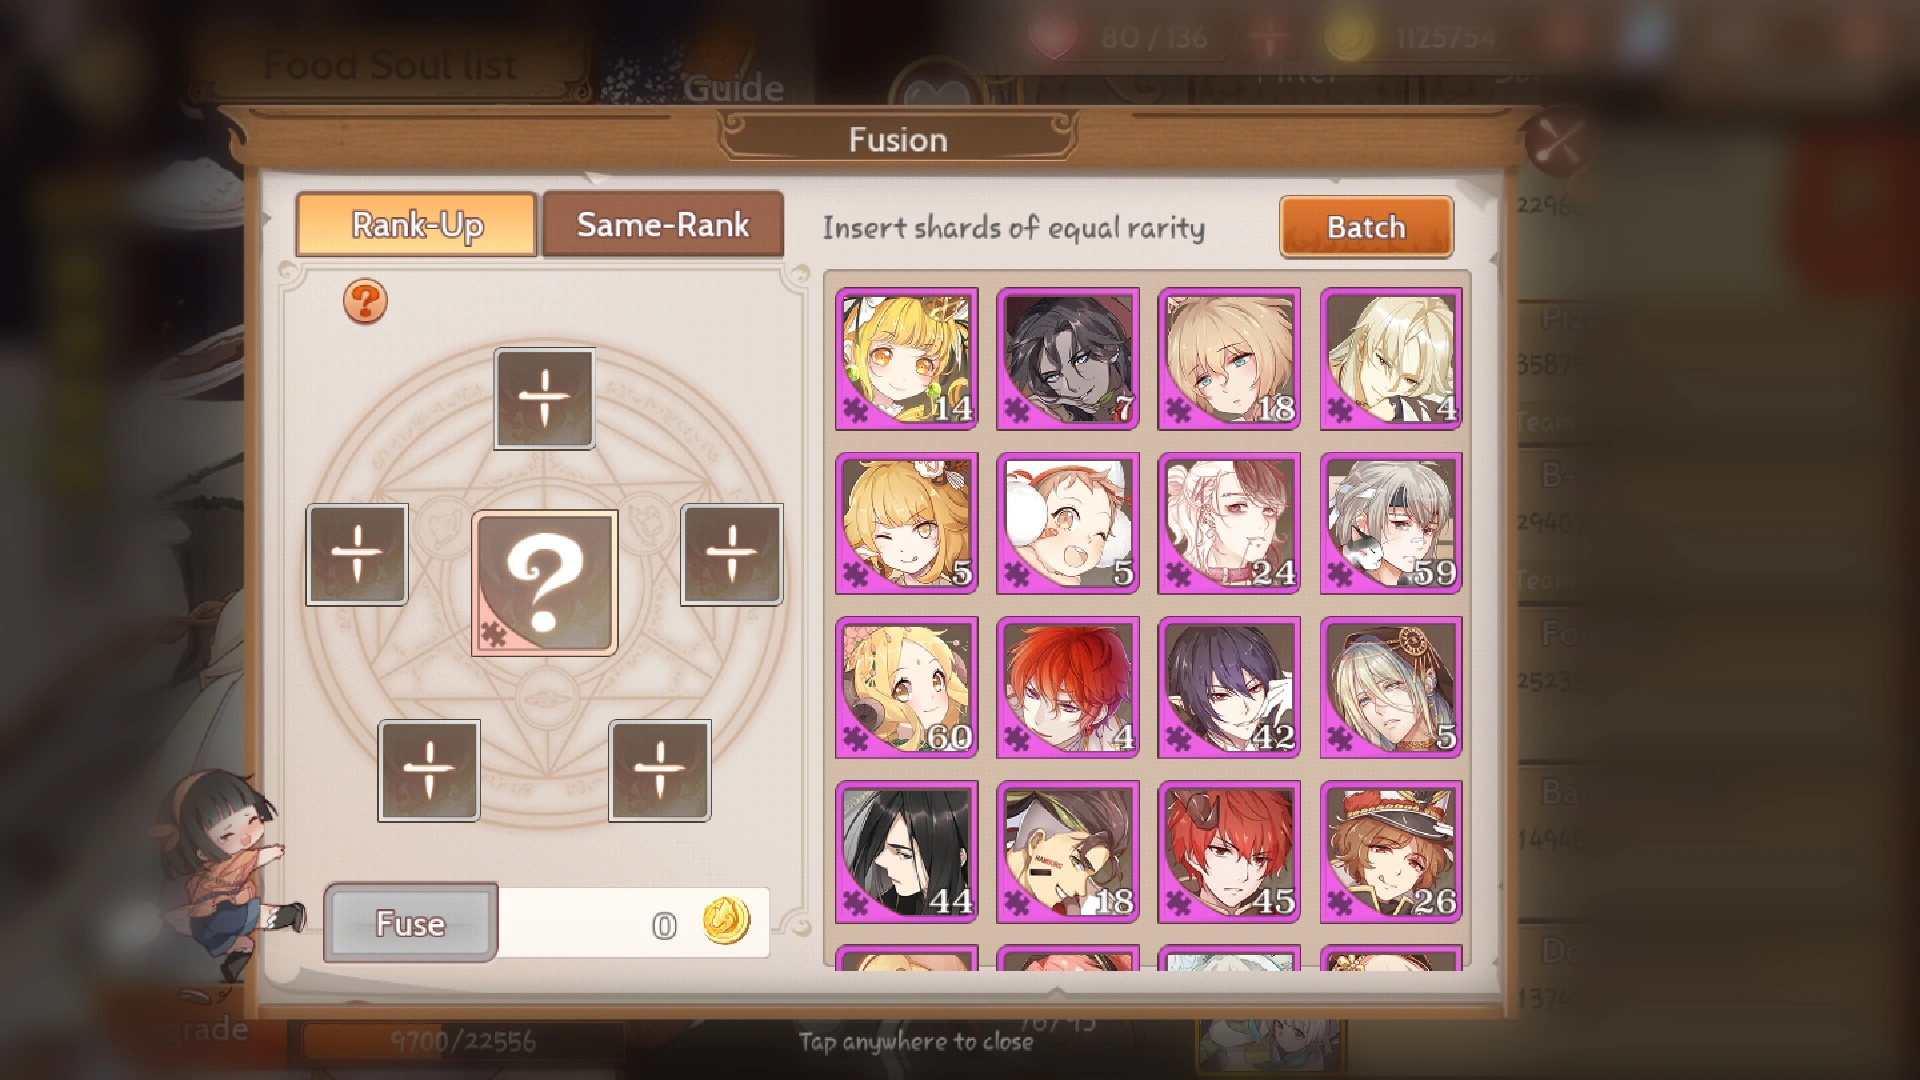
Rank-Up
Use Rank-Up to get shards of a higher rarity that the shards fused.
Requirements
| Shards Required | Results | Cost |
|---|---|---|
| SR shards x5 | 60% chance: UR Shard x1 40% chance: SR Shard x2 |
50,000
|
| R shards x5 | SR Shard x1 |
5,000
|
Fusion Rates
Probabilities of getting certain shards, based on users' experience.

|
The following information is unofficial and originally comes from this source. Official information will be added whenever it's available. |
 to
to 
")
")
")
")
")
")
")
")
")
")
")
")
")
")
")
")
")
 to
to Same Rank
Use Same Rank fusion to get shards of the same rarity that the shards fused.
Requirements
| Shards Required | Results | Cost |
|---|---|---|
| UR shards x3 | UR Shard x1 |
20,000
|
| SR shards x3 | SR Shard x1 |
5,000
|
| R shards x3 | R Shard x1 |
2,000
|
Fusion Rates
TBA