(Created page with "Head over to Team Up to take on unique challenges for awesome rewards! thumb|center|650px In Team Up, you'll have the opportunity to play with players ...") |
(added the new team ups) Tag: Source edit |
||
| (41 intermediate revisions by 11 users not shown) | |||
| Line 1: | Line 1: | ||
| + | [[File:Interface-Team Up.png|right|100px]] |
||
| − | Head over to Team Up to take on unique challenges for awesome rewards! |
||
| + | '''Team Up''' is a daily co-op [[:Category:Trials|Trial]] which unlocks at Player Level 30. Players pair up to defeat Enhanced [[Fallen Angels]] to win Supplies, Food Soul Shards and [[Skins]]. |
||
| + | Team Up is refreshed at midnight UTC. Tap the "Trials" Icon to enter the "Team Up" screen. |
||
| − | [[File:Team_Up.png|thumb|center|650px]] |
||
| + | =='''Battling'''== |
||
| + | You select which Fallen Angel you want to battle and the difficulty level (easy, normal or hard). There are currently 10 available enemies: |
||
| + | *[[Uke Mochi]] (Unlocks at Lv 30) |
||
| + | *[[Aizen]] (Unlocks at Lv 40) |
||
| + | *[[Tsuchigumo]] (Unlocks at Lv 50) |
||
| + | *[[Thundaruda]] (Unlocks at Lv 60) |
||
| + | *[[Leaf Ocean Queen]] (Unlocks at Lv 60) |
||
| + | *[[Uke Mochi (Enhanced)]] (Unlocks at Lv 80) |
||
| + | *[[Inugami]] (Unlocks at Lv 80) |
||
| + | *[[Spectra]] (Unlocks at Lv 80) |
||
| + | *[[Bone Knight]] (Unlocks at Lv 80) |
||
| + | *[[Orochi]] (Unlocks at Lv 80) |
||
| + | The only enemy you will be facing is the boss itself; it won't have any minions. |
||
| − | In Team Up, you'll have the opportunity to play with players from around the world or your friends and take on different Fallen Angel bosses for awesome rewards! |
||
| + | The time limit for each battle is 10 minutes. |
||
| − | Rewards include gold, items, shards and other awesome rewards for you to discover! |
||
| + | |||
| + | You have 10 daily challenge opportunities. You can buy 5 extra chances for 10 Magic Crystals, or 10 extra chances if you are subscribed to the monthly pass. |
||
| + | |||
| + | =='''Teams'''== |
||
| + | Each team has 5 [[Food Souls]] selected by the 2 players out of their respective roster. A solo mode is also an option where one player uses only 3 [[Food Souls]]. One player, the leader, selects three while the other player selects two. The first Food Soul selected by the leading player will be the team captain. Players cannot select the same Food Soul. |
||
| + | |||
| + | If you select "Match", you will either create a new room, or join a room that has not been locked. |
||
| + | |||
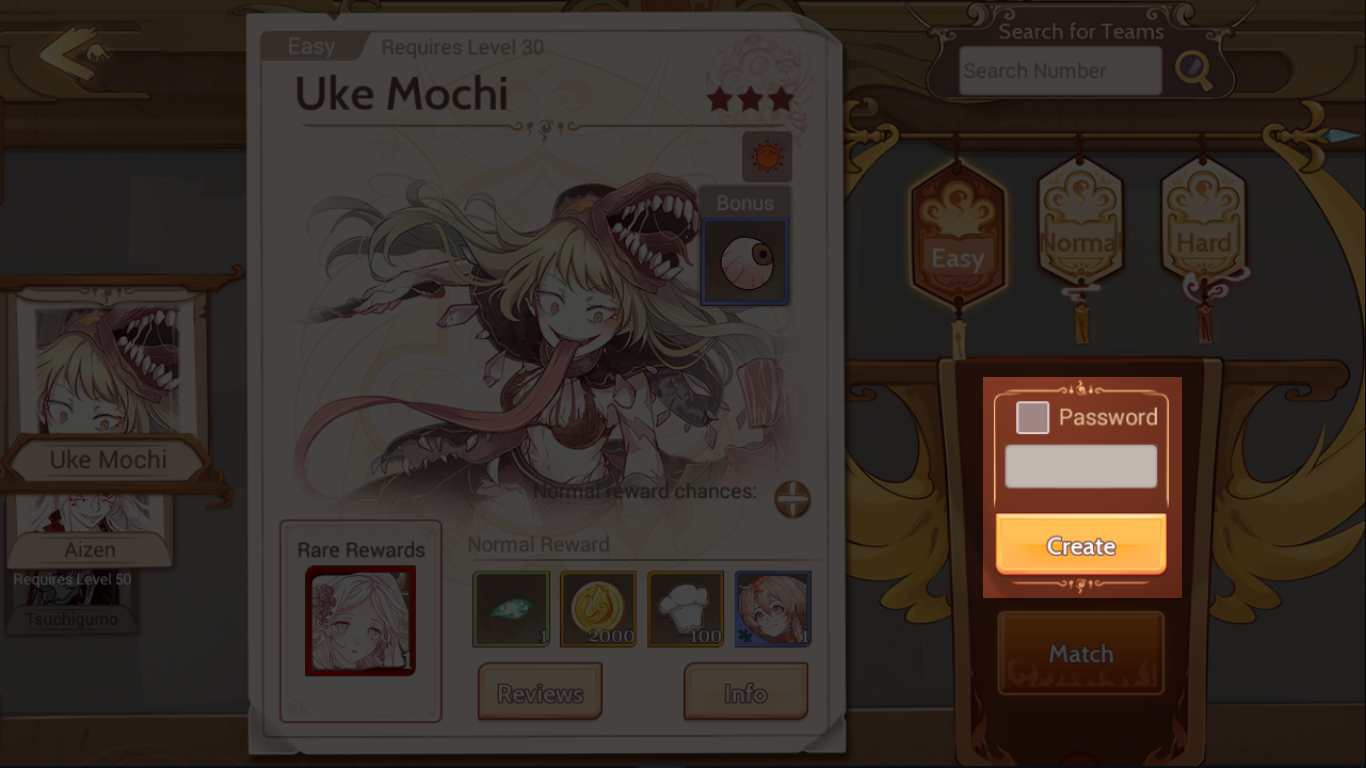
| + | If you wish to play with a friend, |
||
| + | [[File:TeamUp-CreateRoom.png|thumb|right|250px|Creating a room]] |
||
| + | #Select the boss and difficulty you want to play. |
||
| + | #Check the "Password" box. |
||
| + | #Set a password and tap "Create". (You can choose not to set a password as well) |
||
| + | #Once the room is created, you will see the "Team Number" in the top left corner of the screen. |
||
| + | #Send the Team Number and password to your friend for them to join the room. |
||
| + | |||
| + | [[File:TeamUp-JoinRoom.png|thumb|right|250px|Joining a room]] |
||
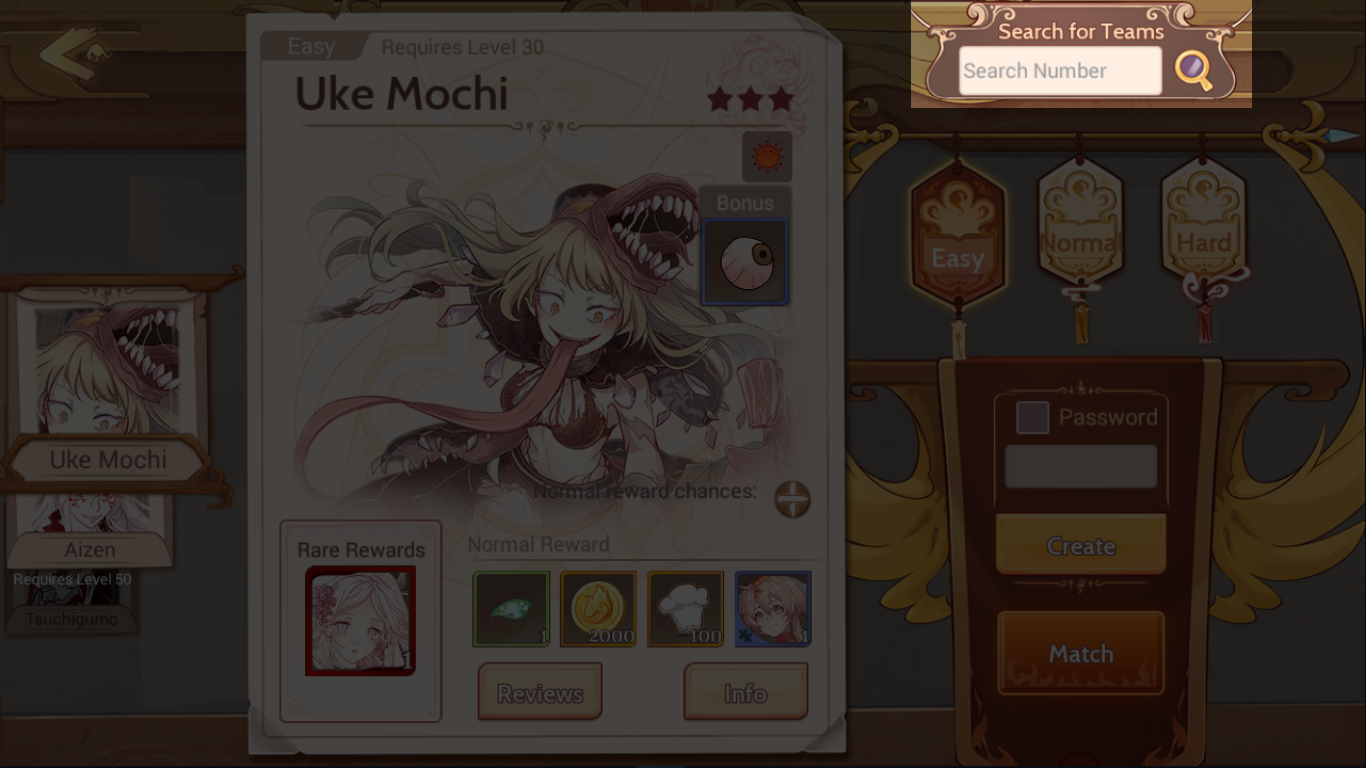
| + | If you wish to join a room, |
||
| + | #Enter the Team Number in the "Search for Teams" bar in the top right of the boss selection screen. |
||
| + | #If the Team Number is valid, you will then be prompted for the password. (Or, if no password has been set, you will directly join the room.) |
||
| + | |||
| + | If you wish to play solo, (Only available to Leaf Ocean King and easier bosses) |
||
| + | #Select the boss and difficult you want to play. |
||
| + | #Check the "Password" box. |
||
| + | #Set a password and tap "Create". (You can choose not to set a password as well) |
||
| + | #Once the room is created, add your desired food souls to the 3 open slots. |
||
| + | #Once all 3 food souls are selected, the "Start" button will light up. |
||
| + | |||
| + | |||
| + | =='''Rewards'''== |
||
| + | There are 3 types of rewards: Normal, Rare and Bonus. |
||
| + | |||
| + | *A normal reward is a random one out of 4 possible rewards. You automatically get it when you defeat the Fallen Angel. |
||
| + | *A rare rewards is a rare skin for a Food Soul. They are not part of normal rewards and a special screen will pop up alerting you of acquiring a Skin. |
||
| + | *A bonus reward is one or several unique tokens matching the type of Fallen Angel you have defeated. You automatically get these when you defeat the Fallen Angel. You can accumulate them to get special avatars and frames. |
||
| + | |||
| + | You can still play for Rare and Bonus rewards after all Normal reward chances have been consumed. |
||
| + | |||
| + | Normal and bonus rewards scale with difficulty but a higher difficulty level does not increase the drop rate of rare rewards. |
||
| + | |||
| + | Collecting 1000 bonus rewards to get a [[Avatars & Frames#Frames|frame]] and 4000 bonus rewards to get an [[Avatars & Frames#Avatars|avatar]]. After collecting 4000 bonus items the stages will no longer drop that associated bonus item. |
||
| + | |||
| + | In Hard levels, [[Bamboo Rice]] or [[Dragon's Beard Candy]] shards can occasionally replace one of the 4 possible Normal Rewards. |
||
| + | |||
| + | ==='''Uke Mochi'''=== |
||
| + | {| class="themedtable" style="width: 100%; text-align:center" |
||
| + | !Difficulty |
||
| + | ! colspan="5" |Normal Rewards (Random 1 out of 4) |
||
| + | !Bonus |
||
| + | !Rare |
||
| + | |- |
||
| + | |Easy |
||
| + | |{{ItemCount |
||
| + | |width= 65px |
||
| + | |img= Icon-Beginner Seasoning.png |
||
| + | |number= 1 |
||
| + | |fontsize= 1.5em |
||
| + | |tooltip=Beginner Seasoning |
||
| + | }} |
||
| + | |{{ItemCount |
||
| + | |width= 65px |
||
| + | |img= Icon-Gold.png |
||
| + | |number= 2,000 |
||
| + | |fontsize= 1.3em |
||
| + | |tooltip=Gold |
||
| + | }} |
||
| + | |{{ItemCount |
||
| + | |width= 65px |
||
| + | |img= Icon-Cooking Power.png |
||
| + | |number= 100 |
||
| + | |fontsize= 1.5em |
||
| + | |tooltip=Cooking Power |
||
| + | }} |
||
| + | |{{ItemCount |
||
| + | |width= 65px |
||
| + | |img= Icon-Long Bao Shard.png |
||
| + | |number= 1 |
||
| + | |fontsize= 1.5em |
||
| + | |tooltip=Long Bao Shard |
||
| + | }} |
||
| + | | |
||
| + | |{{ItemCount |
||
| + | |width= 65px |
||
| + | |img= Icon-Uke Mochi's Evil Eye.png |
||
| + | |number= 1 |
||
| + | |fontsize= 1.5em |
||
| + | |tooltip=Uke Mochi's Evil Eye |
||
| + | }} |
||
| + | | rowspan="3" |{{Popup|text=[[File:Icon-Skin-Milk-Bavarian.png|65px]]|inline=1|popup=Milk's Bavarian Skin<br/>[[File:Skin-Milk-Bavarian.png|250px]]}} |
||
| + | |- |
||
| + | |Normal |
||
| + | |{{ItemCount |
||
| + | |width= 65px |
||
| + | |img= Icon-Beginner Seasoning.png |
||
| + | |number= 2 |
||
| + | |fontsize= 1.5em |
||
| + | |tooltip=Beginner Seasoning |
||
| + | }} |
||
| + | |{{ItemCount |
||
| + | |width= 65px |
||
| + | |img= Icon-Gold.png |
||
| + | |number= 3,000 |
||
| + | |fontsize= 1.3em |
||
| + | |tooltip=Gold |
||
| + | }} |
||
| + | |{{ItemCount |
||
| + | |width= 65px |
||
| + | |img= Icon-Cooking Power.png |
||
| + | |number= 150 |
||
| + | |fontsize= 1.5em |
||
| + | |tooltip=Cooking Power |
||
| + | }} |
||
| + | |{{ItemCount |
||
| + | |width= 65px |
||
| + | |img= Icon-Long Bao Shard.png |
||
| + | |number= 2 |
||
| + | |fontsize= 1.5em |
||
| + | |tooltip=Long Bao Shard |
||
| + | }} |
||
| + | | |
||
| + | |{{ItemCount |
||
| + | |width= 65px |
||
| + | |img= Icon-Uke Mochi's Evil Eye.png |
||
| + | |number= 2 |
||
| + | |fontsize= 1.5em |
||
| + | |tooltip=Uke Mochi's Evil Eye |
||
| + | }} |
||
| + | |- |
||
| + | |Hard |
||
| + | |{{ItemCount |
||
| + | |width= 65px |
||
| + | |img= Icon-Beginner Seasoning.png |
||
| + | |number= 3 |
||
| + | |fontsize= 1.5em |
||
| + | |tooltip=Beginner Seasoning |
||
| + | }} |
||
| + | |{{ItemCount |
||
| + | |width= 65px |
||
| + | |img= Icon-Gold.png |
||
| + | |number= 5,000 |
||
| + | |fontsize= 1.3em |
||
| + | |tooltip=Gold |
||
| + | }} |
||
| + | |{{ItemCount |
||
| + | |width= 65px |
||
| + | |img= Icon-Cooking Power.png |
||
| + | |number= 200 |
||
| + | |fontsize= 1.5em |
||
| + | |tooltip=Cooking Power |
||
| + | }} |
||
| + | |{{ItemCount |
||
| + | |width= 65px |
||
| + | |img= Icon-Cola Shard.png |
||
| + | |number= 1 |
||
| + | |fontsize= 1.5em |
||
| + | |tooltip=Cola Shard |
||
| + | }} |
||
| + | |{{ItemCount |
||
| + | |width= 65px |
||
| + | |img= Icon-Bamboo Rice Shard.png |
||
| + | |number= 1 |
||
| + | |fontsize= 1.5em |
||
| + | |tooltip=Bamboo Rice Shard |
||
| + | }} |
||
| + | |{{ItemCount |
||
| + | |width= 65px |
||
| + | |img= Icon-Uke Mochi's Evil Eye.png |
||
| + | |number= 3 |
||
| + | |fontsize= 1.5em |
||
| + | |tooltip=Uke Mochi's Evil Eye |
||
| + | }} |
||
| + | |} |
||
| + | |||
| + | ==='''Aizen'''=== |
||
| + | {| class="themedtable" style="width: 100%; text-align:center" |
||
| + | !Difficulty |
||
| + | ! colspan="5" |Normal Rewards (Random 1 out of 4) |
||
| + | !Bonus |
||
| + | !Rare |
||
| + | |- |
||
| + | |Easy |
||
| + | |{{ItemCount |
||
| + | |width= 65px |
||
| + | |img= Icon-Beginner Seasoning.png |
||
| + | |number= 1 |
||
| + | |fontsize= 1.5em |
||
| + | |tooltip=Beginner Seasoning |
||
| + | }} |
||
| + | |{{ItemCount |
||
| + | |width= 65px |
||
| + | |img= Icon-Gold.png |
||
| + | |number= 2,000 |
||
| + | |fontsize= 1.3em |
||
| + | |tooltip=Gold |
||
| + | }} |
||
| + | |{{ItemCount |
||
| + | |width= 65px |
||
| + | |img= Icon-Cooking Power.png |
||
| + | |number= 100 |
||
| + | |fontsize= 1.5em |
||
| + | |tooltip=Cooking Power |
||
| + | }} |
||
| + | |{{ItemCount |
||
| + | |width= 65px |
||
| + | |img= Icon-Crepe Shard.png |
||
| + | |number= 1 |
||
| + | |fontsize= 1.5em |
||
| + | |tooltip=Crepe Shard |
||
| + | }} |
||
| + | | |
||
| + | |{{ItemCount |
||
| + | |width= 65px |
||
| + | |img= Icon-Aizen's Fine Wine.png |
||
| + | |number= 1 |
||
| + | |fontsize= 1.5em |
||
| + | |tooltip=Aizen's Fine Wine |
||
| + | }} |
||
| + | | rowspan="3" |{{Popup|text=[[File:Icon-Skin-Jiuniang-Full Moon.png|65px]]|inline=1|popup=Jiuniang's Full Moon Skin<br/>[[File:Skin-Jiuniang-Full Moon.png|250px]]}} |
||
| + | |- |
||
| + | |Normal |
||
| + | |{{ItemCount |
||
| + | |width= 65px |
||
| + | |img= Icon-Beginner Seasoning.png |
||
| + | |number= 2 |
||
| + | |fontsize= 1.5em |
||
| + | |tooltip=Beginner Seasoning |
||
| + | }} |
||
| + | |{{ItemCount |
||
| + | |width= 65px |
||
| + | |img= Icon-Gold.png |
||
| + | |number= 3,000 |
||
| + | |fontsize= 1.3em |
||
| + | |tooltip=Gold |
||
| + | }} |
||
| + | |{{ItemCount |
||
| + | |width= 65px |
||
| + | |img= Icon-Cooking Power.png |
||
| + | |number= 150 |
||
| + | |fontsize= 1.5em |
||
| + | |tooltip=Cooking Power |
||
| + | }} |
||
| + | |{{ItemCount |
||
| + | |width= 65px |
||
| + | |img= Icon-Crepe Shard.png |
||
| + | |number= 2 |
||
| + | |fontsize= 1.5em |
||
| + | |tooltip=Crepe Shard |
||
| + | }} |
||
| + | | |
||
| + | |{{ItemCount |
||
| + | |width= 65px |
||
| + | |img= Icon-Aizen's Fine Wine.png |
||
| + | |number= 2 |
||
| + | |fontsize= 1.5em |
||
| + | |tooltip=Aizen's Fine Wine |
||
| + | }} |
||
| + | |- |
||
| + | |Hard |
||
| + | |{{ItemCount |
||
| + | |width= 65px |
||
| + | |img= Icon-Beginner Seasoning.png |
||
| + | |number= 3 |
||
| + | |fontsize= 1.5em |
||
| + | |tooltip=Beginner Seasoning |
||
| + | }} |
||
| + | |{{ItemCount |
||
| + | |width= 65px |
||
| + | |img= Icon-Gold.png |
||
| + | |number= 5,000 |
||
| + | |fontsize= 1.3em |
||
| + | |tooltip=Gold |
||
| + | }} |
||
| + | |{{ItemCount |
||
| + | |width= 65px |
||
| + | |img= Icon-Cooking Power.png |
||
| + | |number= 200 |
||
| + | |fontsize= 1.5em |
||
| + | |tooltip=Cooking Power |
||
| + | }} |
||
| + | |{{ItemCount |
||
| + | |width= 65px |
||
| + | |img= Icon-Salty Tofu Shard.png |
||
| + | |number= 1 |
||
| + | |fontsize= 1.5em |
||
| + | |tooltip=Salty Tofu Shard |
||
| + | }} |
||
| + | |{{ItemCount |
||
| + | |width= 65px |
||
| + | |img= Icon-Bamboo Rice Shard.png |
||
| + | |number= 1 |
||
| + | |fontsize= 1.5em |
||
| + | |tooltip=Bamboo Rice Shard |
||
| + | }} |
||
| + | |{{ItemCount |
||
| + | |width= 65px |
||
| + | |img= Icon-Aizen's Fine Wine.png |
||
| + | |number= 3 |
||
| + | |fontsize= 1.5em |
||
| + | |tooltip=Aizen's Fine Wine |
||
| + | }} |
||
| + | |} |
||
| + | |||
| + | ==='''Tsuchigumo'''=== |
||
| + | {| class="themedtable" style="width: 100%; text-align:center" |
||
| + | !Difficulty |
||
| + | ! colspan="5" |Normal Rewards (Random 1 out of 4) |
||
| + | !Bonus |
||
| + | !Rare |
||
| + | |- |
||
| + | |Easy |
||
| + | |{{ItemCount |
||
| + | |width= 65px |
||
| + | |img= Icon-Beginner Seasoning.png |
||
| + | |number= 1 |
||
| + | |fontsize= 1.5em |
||
| + | |tooltip=Beginner Seasoning |
||
| + | }} |
||
| + | |{{ItemCount |
||
| + | |width= 65px |
||
| + | |img= Icon-Gold.png |
||
| + | |number= 2,000 |
||
| + | |fontsize= 1.3em |
||
| + | |tooltip=Gold |
||
| + | }} |
||
| + | |{{ItemCount |
||
| + | |width= 65px |
||
| + | |img= Icon-Cooking Power.png |
||
| + | |number= 100 |
||
| + | |fontsize= 1.5em |
||
| + | |tooltip=Cooking Power |
||
| + | }} |
||
| + | |{{ItemCount |
||
| + | |width= 65px |
||
| + | |img= Icon-Cold Rice Shrimp Shard.png |
||
| + | |number= 1 |
||
| + | |fontsize= 1.5em |
||
| + | |tooltip=Cold Rice Shrimp Shard |
||
| + | }} |
||
| + | | |
||
| + | |{{ItemCount |
||
| + | |width= 65px |
||
| + | |img= Icon-Tsuchigumo's Fragment.png |
||
| + | |number= 1 |
||
| + | |fontsize= 1.5em |
||
| + | |tooltip=Tsuchigumo's Fragment |
||
| + | }} |
||
| + | | rowspan="3" |{{Popup|text=[[File:Icon-Skin-Omurice-Sleepy Time.png|65px]]|inline=1|popup=Omurice's Sleepy Time Skin<br/>[[File:Skin-Omurice-Sleepy Time.png|250px]]}} |
||
| + | |- |
||
| + | |Normal |
||
| + | |{{ItemCount |
||
| + | |width= 65px |
||
| + | |img= Icon-Beginner Seasoning.png |
||
| + | |number= 2 |
||
| + | |fontsize= 1.5em |
||
| + | |tooltip=Beginner Seasoning |
||
| + | }} |
||
| + | |{{ItemCount |
||
| + | |width= 65px |
||
| + | |img= Icon-Gold.png |
||
| + | |number= 3,000 |
||
| + | |fontsize= 1.3em |
||
| + | |tooltip=Gold |
||
| + | }} |
||
| + | |{{ItemCount |
||
| + | |width= 65px |
||
| + | |img= Icon-Cooking Power.png |
||
| + | |number= 150 |
||
| + | |fontsize= 1.5em |
||
| + | |tooltip=Cooking Power |
||
| + | }} |
||
| + | |{{ItemCount |
||
| + | |width= 65px |
||
| + | |img= Icon-Cold Rice Shrimp Shard.png |
||
| + | |number= 2 |
||
| + | |fontsize= 1.5em |
||
| + | |tooltip=Cold Rice Shrimp Shard |
||
| + | }} |
||
| + | | |
||
| + | |{{ItemCount |
||
| + | |width= 65px |
||
| + | |img= Icon-Tsuchigumo's Fragment.png |
||
| + | |number= 2 |
||
| + | |fontsize= 1.5em |
||
| + | |tooltip=Tsuchigumo's Fragment |
||
| + | }} |
||
| + | |- |
||
| + | |Hard |
||
| + | |{{ItemCount |
||
| + | |width= 65px |
||
| + | |img= Icon-Beginner Seasoning.png |
||
| + | |number= 2 |
||
| + | |fontsize= 1.5em |
||
| + | |tooltip=Beginner Seasoning |
||
| + | }} |
||
| + | |{{ItemCount |
||
| + | |width= 65px |
||
| + | |img= Icon-Gold.png |
||
| + | |number= 5,000 |
||
| + | |fontsize= 1.3em |
||
| + | |tooltip=Gold |
||
| + | }} |
||
| + | |{{ItemCount |
||
| + | |width= 65px |
||
| + | |img= Icon-Cooking Power.png |
||
| + | |number= 200 |
||
| + | |fontsize= 1.5em |
||
| + | |tooltip=Cooking Power |
||
| + | }} |
||
| + | |{{ItemCount |
||
| + | |width= 65px |
||
| + | |img= Icon-Tortoise Jelly Shard.png |
||
| + | |number= 1 |
||
| + | |fontsize= 1.5em |
||
| + | |tooltip=Tortoise Jelly Shard |
||
| + | }} |
||
| + | |{{ItemCount |
||
| + | |width= 65px |
||
| + | |img= Icon-Bamboo Rice Shard.png |
||
| + | |number= 1 |
||
| + | |fontsize= 1.5em |
||
| + | |tooltip=Bamboo Rice Shard |
||
| + | }} |
||
| + | |{{ItemCount |
||
| + | |width= 65px |
||
| + | |img= Icon-Tsuchigumo's Fragment.png |
||
| + | |number= 3 |
||
| + | |fontsize= 1.5em |
||
| + | |tooltip=Tsuchigumo's Fragment |
||
| + | }} |
||
| + | |} |
||
| + | |||
| + | ==='''Thundaruda'''=== |
||
| + | {| class="themedtable" style="width: 100%; text-align:center" |
||
| + | !Difficulty |
||
| + | ! colspan="5" |Normal Rewards (Random 1 out of 4) |
||
| + | !Bonus |
||
| + | !Rare |
||
| + | |- |
||
| + | |Easy |
||
| + | |{{ItemCount |
||
| + | |width= 65px |
||
| + | |img= Icon-Beginner Seasoning.png |
||
| + | |number= 3 |
||
| + | |fontsize= 1.5em |
||
| + | |tooltip=Beginner Seasoning |
||
| + | }} |
||
| + | |{{ItemCount |
||
| + | |width= 65px |
||
| + | |img= Icon-Gold.png |
||
| + | |number= 3,000 |
||
| + | |fontsize= 1.3em |
||
| + | |tooltip=Gold |
||
| + | }} |
||
| + | |{{ItemCount |
||
| + | |width= 65px |
||
| + | |img= Icon-Cooking Power.png |
||
| + | |number= 150 |
||
| + | |fontsize= 1.5em |
||
| + | |tooltip=Cooking Power |
||
| + | }} |
||
| + | |{{ItemCount |
||
| + | |width= 65px |
||
| + | |img= Icon-Cola Shard.png |
||
| + | |number= 1 |
||
| + | |fontsize= 1.5em |
||
| + | |tooltip=Cola Shard |
||
| + | }} |
||
| + | | |
||
| + | |{{ItemCount |
||
| + | |width= 65px |
||
| + | |img= Icon-Thundaruda's Wing.png |
||
| + | |number= 1 |
||
| + | |fontsize= 1.5em |
||
| + | |tooltip=Thundaruda's Wing |
||
| + | }} |
||
| + | | rowspan="3" |{{Popup|text=[[File:Icon-Skin-Nasi Lemak-Summer Love Song.png|65px]]|inline=1|popup=Nasi Lemak's Summer Love Song Skin<br/>[[File:Skin-Nasi Lemak-Summer Love Song.png|250px]]}} |
||
| + | |- |
||
| + | |Normal |
||
| + | |{{ItemCount |
||
| + | |width= 65px |
||
| + | |img= Icon-Beginner Seasoning.png |
||
| + | |number= 5 |
||
| + | |fontsize= 1.5em |
||
| + | |tooltip=Beginner Seasoning |
||
| + | }} |
||
| + | |{{ItemCount |
||
| + | |width= 65px |
||
| + | |img= Icon-Gold.png |
||
| + | |number= 5,000 |
||
| + | |fontsize= 1.3em |
||
| + | |tooltip=Gold |
||
| + | }} |
||
| + | |{{ItemCount |
||
| + | |width= 65px |
||
| + | |img= Icon-Cooking Power.png |
||
| + | |number= 200 |
||
| + | |fontsize= 1.5em |
||
| + | |tooltip=Cooking Power |
||
| + | }} |
||
| + | |{{ItemCount |
||
| + | |width= 65px |
||
| + | |img= Icon-Cola Shard.png |
||
| + | |number= 2 |
||
| + | |fontsize= 1.5em |
||
| + | |tooltip=Cola Shard |
||
| + | }} |
||
| + | | |
||
| + | |{{ItemCount |
||
| + | |width= 65px |
||
| + | |img= Icon-Thundaruda's Wing.png |
||
| + | |number= 2 |
||
| + | |fontsize= 1.5em |
||
| + | |tooltip=Thundaruda's Wing |
||
| + | }} |
||
| + | |- |
||
| + | |Hard |
||
| + | |{{ItemCount |
||
| + | |width= 65px |
||
| + | |img= Icon-Beginner Seasoning.png |
||
| + | |number= 8 |
||
| + | |fontsize= 1.5em |
||
| + | |tooltip=Beginner Seasoning |
||
| + | }} |
||
| + | |{{ItemCount |
||
| + | |width= 65px |
||
| + | |img= Icon-Gold.png |
||
| + | |number= 10,000 |
||
| + | |fontsize= 1.3em |
||
| + | |tooltip=Gold |
||
| + | }} |
||
| + | |{{ItemCount |
||
| + | |width= 65px |
||
| + | |img= Icon-Cooking Power.png |
||
| + | |number= 300 |
||
| + | |fontsize= 1.5em |
||
| + | |tooltip=Cooking Power |
||
| + | }} |
||
| + | |{{ItemCount |
||
| + | |width= 65px |
||
| + | |img= Icon-Sweet & Sour Fish Shard.png |
||
| + | |number= 1 |
||
| + | |fontsize= 1.5em |
||
| + | |tooltip=Sweet & Sour Fish Shard |
||
| + | }} |
||
| + | |{{ItemCount |
||
| + | |width= 65px |
||
| + | |img= Icon-Bamboo Rice Shard.png |
||
| + | |number= 1 |
||
| + | |fontsize= 1.5em |
||
| + | |tooltip=Bamboo Rice Shard |
||
| + | }} |
||
| + | |{{ItemCount |
||
| + | |width= 65px |
||
| + | |img= Icon-Thundaruda's Wing.png |
||
| + | |number= 3 |
||
| + | |fontsize= 1.5em |
||
| + | |tooltip=Thundaruda's Wing |
||
| + | }} |
||
| + | |} |
||
| + | |||
| + | ==='''Leaf Ocean Queen'''=== |
||
| + | {| class="themedtable" style="width: 100%; text-align:center" |
||
| + | !Difficulty |
||
| + | ! colspan="5" |Normal Rewards (Random 1 out of 4) |
||
| + | !Bonus |
||
| + | !Rare |
||
| + | |- |
||
| + | |Easy |
||
| + | |{{ItemCount |
||
| + | |width= 65px |
||
| + | |img= Icon-Beginner Seasoning.png |
||
| + | |number= 3 |
||
| + | |fontsize= 1.5em |
||
| + | |tooltip=Beginner Seasoning |
||
| + | }} |
||
| + | |{{ItemCount |
||
| + | |width= 65px |
||
| + | |img= Icon-Gold.png |
||
| + | |number= 3,000 |
||
| + | |fontsize= 1.3em |
||
| + | |tooltip=Gold |
||
| + | }} |
||
| + | |{{ItemCount |
||
| + | |width= 65px |
||
| + | |img= Icon-Cooking Power.png |
||
| + | |number= 150 |
||
| + | |fontsize= 1.5em |
||
| + | |tooltip=Cooking Power |
||
| + | }} |
||
| + | |{{ItemCount |
||
| + | |width= 65px |
||
| + | |img= Icon-Double-Ninth Cake Shard.png |
||
| + | |number= 1 |
||
| + | |fontsize= 1.5em |
||
| + | |tooltip=Double-Ninth Cake Shard |
||
| + | }} |
||
| + | | |
||
| + | |{{ItemCount |
||
| + | |width= 65px |
||
| + | |img= Icon-Leaf Ocean Queen Wings.png |
||
| + | |number= 1 |
||
| + | |fontsize= 1.5em |
||
| + | |tooltip=Leaf Ocean Queen Wings |
||
| + | }} |
||
| + | | rowspan="3" |{{Popup|text=[[File:Icon-Skin-Napoleon Cake-Dessert Time.png|65px]]|inline=1|popup=Napoleon Cake's Dessert Time Skin<br/>[[File:Skin-Napoleon Cake-Dessert Time.png|250px]]}} |
||
| + | |- |
||
| + | |Normal |
||
| + | |{{ItemCount |
||
| + | |width= 65px |
||
| + | |img= Icon-Beginner Seasoning.png |
||
| + | |number= 5 |
||
| + | |fontsize= 1.5em |
||
| + | |tooltip=Beginner Seasoning |
||
| + | }} |
||
| + | |{{ItemCount |
||
| + | |width= 65px |
||
| + | |img= Icon-Gold.png |
||
| + | |number= 5,000 |
||
| + | |fontsize= 1.3em |
||
| + | |tooltip=Gold |
||
| + | }} |
||
| + | |{{ItemCount |
||
| + | |width= 65px |
||
| + | |img= Icon-Cooking Power.png |
||
| + | |number= 200 |
||
| + | |fontsize= 1.5em |
||
| + | |tooltip=Cooking Power |
||
| + | }} |
||
| + | |{{ItemCount |
||
| + | |width= 65px |
||
| + | |img= Icon-Double-Ninth Cake Shard.png |
||
| + | |number= 2 |
||
| + | |fontsize= 1.5em |
||
| + | |tooltip=Double-Ninth Cake Shard |
||
| + | }} |
||
| + | | |
||
| + | |{{ItemCount |
||
| + | |width= 65px |
||
| + | |img= Icon-Leaf Ocean Queen Wings.png |
||
| + | |number= 2 |
||
| + | |fontsize= 1.5em |
||
| + | |tooltip=Leaf Ocean Queen Wings |
||
| + | }} |
||
| + | |- |
||
| + | |Hard |
||
| + | |{{ItemCount |
||
| + | |width= 65px |
||
| + | |img= Icon-Beginner Seasoning.png |
||
| + | |number= 8 |
||
| + | |fontsize= 1.5em |
||
| + | |tooltip=Beginner Seasoning |
||
| + | }} |
||
| + | |{{ItemCount |
||
| + | |width= 65px |
||
| + | |img= Icon-Gold.png |
||
| + | |number= 10,000 |
||
| + | |fontsize= 1.3em |
||
| + | |tooltip=Gold |
||
| + | }} |
||
| + | |{{ItemCount |
||
| + | |width= 65px |
||
| + | |img= Icon-Cooking Power.png |
||
| + | |number= 300 |
||
| + | |fontsize= 1.5em |
||
| + | |tooltip=Cooking Power |
||
| + | }} |
||
| + | |{{ItemCount |
||
| + | |width= 65px |
||
| + | |img= Icon-Qingtuan Shard.png |
||
| + | |number= 1 |
||
| + | |fontsize= 1.5em |
||
| + | |tooltip=Qingtuan Shard |
||
| + | }} |
||
| + | |{{ItemCount |
||
| + | |width= 65px |
||
| + | |number= 1 |
||
| + | |fontsize= 1.5em |
||
| + | |tooltip=Dragon's Beard Candy Shard |
||
| + | }} |
||
| + | |{{ItemCount |
||
| + | |width= 65px |
||
| + | |img= Icon-Leaf Ocean Queen Wings.png |
||
| + | |number= 3 |
||
| + | |fontsize= 1.5em |
||
| + | |tooltip=Leaf Ocean Queen Wings |
||
| + | }} |
||
| + | |} |
||
| + | |||
| + | ==='''Uke Mochi (Enhanced)'''=== |
||
| + | {| class="themedtable" style="width: 100%; text-align:center" |
||
| + | !Difficulty |
||
| + | ! colspan="5" |Normal Rewards (Random 1 out of 4) |
||
| + | !Bonus |
||
| + | !Rare |
||
| + | |- |
||
| + | |Easy |
||
| + | |{{ItemCount |
||
| + | |width= 65px |
||
| + | |img= Icon-Beginner Seasoning.png |
||
| + | |number= 3 |
||
| + | |fontsize= 1.5em |
||
| + | |tooltip=Beginner Seasoning |
||
| + | }} |
||
| + | |{{ItemCount |
||
| + | |width= 65px |
||
| + | |img= Icon-Gold.png |
||
| + | |number= 3,000 |
||
| + | |fontsize= 1.3em |
||
| + | |tooltip=Gold |
||
| + | }} |
||
| + | |{{ItemCount |
||
| + | |width= 65px |
||
| + | |img= Icon-Cooking Power.png |
||
| + | |number= 150 |
||
| + | |fontsize= 1.5em |
||
| + | |tooltip=Cooking Power |
||
| + | }} |
||
| + | |{{ItemCount |
||
| + | |width= 65px |
||
| + | |img= Icon-Eclair Shard.png |
||
| + | |number= 1 |
||
| + | |fontsize= 1.5em |
||
| + | |tooltip=Eclair Shard |
||
| + | }} |
||
| + | | |
||
| + | |{{ItemCount |
||
| + | |width= 65px |
||
| + | |img= Icon-Uke Mochi (Enhanced) Tentacle.png |
||
| + | |number= 1 |
||
| + | |fontsize= 1.5em |
||
| + | |tooltip=Uke Mochi (Enhanced) Tentacle |
||
| + | }} |
||
| + | | rowspan="3" |{{Popup|text=[[File:Icon-Skin-Strawberry Daifuku-Simple Pleasures.png|65px]]|inline=1|popup=Strawberry Daifuku's Simple Pleasures Skin<br/>[[File:Skin-Strawberry Daifuku-Simple Pleasures.png|250px]]}} |
||
| + | |- |
||
| + | |Normal |
||
| + | |{{ItemCount |
||
| + | |width= 65px |
||
| + | |img= Icon-Beginner Seasoning.png |
||
| + | |number= 5 |
||
| + | |fontsize= 1.5em |
||
| + | |tooltip=Beginner Seasoning |
||
| + | }} |
||
| + | |{{ItemCount |
||
| + | |width= 65px |
||
| + | |img= Icon-Gold.png |
||
| + | |number= 5,000 |
||
| + | |fontsize= 1.3em |
||
| + | |tooltip=Gold |
||
| + | }} |
||
| + | |{{ItemCount |
||
| + | |width= 65px |
||
| + | |img= Icon-Cooking Power.png |
||
| + | |number= 200 |
||
| + | |fontsize= 1.5em |
||
| + | |tooltip=Cooking Power |
||
| + | }} |
||
| + | |{{ItemCount |
||
| + | |width= 65px |
||
| + | |img= Icon-Eclair Shard.png |
||
| + | |number= 2 |
||
| + | |fontsize= 1.5em |
||
| + | |tooltip=Eclair Shard |
||
| + | }} |
||
| + | | |
||
| + | |{{ItemCount |
||
| + | |width= 65px |
||
| + | |img= Icon-Uke Mochi (Enhanced) Tentacle.png |
||
| + | |number= 2 |
||
| + | |fontsize= 1.5em |
||
| + | |tooltip=Uke Mochi (Enhanced) Tentacle |
||
| + | }} |
||
| + | |- |
||
| + | |Hard |
||
| + | |{{ItemCount |
||
| + | |width= 65px |
||
| + | |img= Icon-Beginner Seasoning.png |
||
| + | |number= 8 |
||
| + | |fontsize= 1.5em |
||
| + | |tooltip=Beginner Seasoning |
||
| + | }} |
||
| + | |{{ItemCount |
||
| + | |width= 65px |
||
| + | |img= Icon-Gold.png |
||
| + | |number= 10,000 |
||
| + | |fontsize= 1.3em |
||
| + | |tooltip=Gold |
||
| + | }} |
||
| + | |{{ItemCount |
||
| + | |width= 65px |
||
| + | |img= Icon-Cooking Power.png |
||
| + | |number= 300 |
||
| + | |fontsize= 1.5em |
||
| + | |tooltip=Cooking Power |
||
| + | }} |
||
| + | |{{ItemCount |
||
| + | |width= 65px |
||
| + | |img= Icon-Mung Bean Soup Shard.png |
||
| + | |number= 1 |
||
| + | |fontsize= 1.5em |
||
| + | |tooltip=Mung Bean Soup Shard |
||
| + | }} |
||
| + | |{{ItemCount |
||
| + | |width= 65px |
||
| + | |number= 1 |
||
| + | |fontsize= 1.5em |
||
| + | |tooltip=Dragon's Beard Candy Shard |
||
| + | }} |
||
| + | |{{ItemCount |
||
| + | |width= 65px |
||
| + | |img= Icon-Uke Mochi (Enhanced) Tentacle.png |
||
| + | |number= 3 |
||
| + | |fontsize= 1.5em |
||
| + | |tooltip=Uke Mochi (Enhanced) Tentacle |
||
| + | }} |
||
| + | |} |
||
| + | |||
| + | ==='''Inugami'''=== |
||
| + | {| class="themedtable" style="width: 100%; text-align:center" |
||
| + | !Difficulty |
||
| + | ! colspan="5" |Normal Rewards (Random 1 out of 4) |
||
| + | !Bonus |
||
| + | !Rare |
||
| + | |- |
||
| + | |Easy |
||
| + | |{{ItemCount |
||
| + | |width= 65px |
||
| + | |img= Icon-Beginner Seasoning.png |
||
| + | |number= 3 |
||
| + | |fontsize= 1.5em |
||
| + | |tooltip=Beginner Seasoning |
||
| + | }} |
||
| + | |{{ItemCount |
||
| + | |width= 65px |
||
| + | |img= Icon-Gold.png |
||
| + | |number= 3,000 |
||
| + | |fontsize= 1.3em |
||
| + | |tooltip=Gold |
||
| + | }} |
||
| + | |{{ItemCount |
||
| + | |width= 65px |
||
| + | |img= Icon-Cooking Power.png |
||
| + | |number= 150 |
||
| + | |fontsize= 1.5em |
||
| + | |tooltip=Cooking Power |
||
| + | }} |
||
| + | |{{ItemCount |
||
| + | |width= 65px |
||
| + | |img= Icon-Yakitori Shard.png |
||
| + | |number= 1 |
||
| + | |fontsize= 1.5em |
||
| + | |tooltip=Yakitori Shard |
||
| + | }} |
||
| + | | |
||
| + | |{{ItemCount |
||
| + | |width= 65px |
||
| + | |img= Icon-Inugami Soulflame.png |
||
| + | |number= 1 |
||
| + | |fontsize= 1.5em |
||
| + | |tooltip=Inugami Soulflame |
||
| + | }} |
||
| + | | rowspan="3" |{{Popup|text=[[File:Icon-Skin-Black Tea-Perfectionism.png|65px]]|inline=1|popup=Black Tea's Perfectionism Skin<br/>[[File:Skin-Black Tea-Perfectionism.png|250px]]}} |
||
| + | |- |
||
| + | |Normal |
||
| + | |{{ItemCount |
||
| + | |width= 65px |
||
| + | |img= Icon-Beginner Seasoning.png |
||
| + | |number= 5 |
||
| + | |fontsize= 1.5em |
||
| + | |tooltip=Beginner Seasoning |
||
| + | }} |
||
| + | |{{ItemCount |
||
| + | |width= 65px |
||
| + | |img= Icon-Gold.png |
||
| + | |number= 5,000 |
||
| + | |fontsize= 1.3em |
||
| + | |tooltip=Gold |
||
| + | }} |
||
| + | |{{ItemCount |
||
| + | |width= 65px |
||
| + | |img= Icon-Cooking Power.png |
||
| + | |number= 200 |
||
| + | |fontsize= 1.5em |
||
| + | |tooltip=Cooking Power |
||
| + | }} |
||
| + | |{{ItemCount |
||
| + | |width= 65px |
||
| + | |img= Icon-Yakitori Shard.png |
||
| + | |number= 2 |
||
| + | |fontsize= 1.5em |
||
| + | |tooltip=Yakitori Shard |
||
| + | }} |
||
| + | | |
||
| + | |{{ItemCount |
||
| + | |width= 65px |
||
| + | |img= Icon-Inugami Soulflame.png |
||
| + | |number= 2 |
||
| + | |fontsize= 1.5em |
||
| + | |tooltip=Inugami Soulflame |
||
| + | }} |
||
| + | |- |
||
| + | |Hard |
||
| + | |{{ItemCount |
||
| + | |width= 65px |
||
| + | |img= Icon-Beginner Seasoning.png |
||
| + | |number= 8 |
||
| + | |fontsize= 1.5em |
||
| + | |tooltip=Beginner Seasoning |
||
| + | }} |
||
| + | |{{ItemCount |
||
| + | |width= 65px |
||
| + | |img= Icon-Gold.png |
||
| + | |number= 10,000 |
||
| + | |fontsize= 1.3em |
||
| + | |tooltip=Gold |
||
| + | }} |
||
| + | |{{ItemCount |
||
| + | |width= 65px |
||
| + | |img= Icon-Cooking Power.png |
||
| + | |number= 300 |
||
| + | |fontsize= 1.5em |
||
| + | |tooltip=Cooking Power |
||
| + | }} |
||
| + | |{{ItemCount |
||
| + | |width= 65px |
||
| + | |img= Icon-Soft Serve Cone Shard.png |
||
| + | |number= 1 |
||
| + | |fontsize= 1.5em |
||
| + | |tooltip=Soft Serve Cone Shard |
||
| + | }} |
||
| + | |{{ItemCount |
||
| + | |width= 65px |
||
| + | |number= 1 |
||
| + | |fontsize= 1.5em |
||
| + | |tooltip=Dragon's Beard Candy Shard |
||
| + | }} |
||
| + | |{{ItemCount |
||
| + | |width= 65px |
||
| + | |img= Icon-Inugami Soulflame.png |
||
| + | |number= 3 |
||
| + | |fontsize= 1.5em |
||
| + | |tooltip=Inugami Soulflame |
||
| + | }} |
||
| + | |} |
||
| + | ==='''Spectra'''=== |
||
| + | {| class="themedtable" style="width: 100%; text-align:center" |
||
| + | !Difficulty |
||
| + | ! colspan="5" |Normal Rewards (Random 1 out of 4) |
||
| + | !Bonus |
||
| + | !Rare |
||
| + | |- |
||
| + | |Easy |
||
| + | |{{ItemCount |
||
| + | |width= 65px |
||
| + | |img= Icon-Beginner Seasoning.png |
||
| + | |number= 3 |
||
| + | |fontsize= 1.5em |
||
| + | |tooltip=Beginner Seasoning |
||
| + | }} |
||
| + | |{{ItemCount |
||
| + | |width= 65px |
||
| + | |img= Icon-Gold.png |
||
| + | |number= 3,000 |
||
| + | |fontsize= 1.3em |
||
| + | |tooltip=Gold |
||
| + | }} |
||
| + | |{{ItemCount |
||
| + | |width= 65px |
||
| + | |img= Icon-Cooking Power.png |
||
| + | |number= 150 |
||
| + | |fontsize= 1.5em |
||
| + | |tooltip=Cooking Power |
||
| + | }} |
||
| + | |{{ItemCount |
||
| + | |width= 65px |
||
| + | |img= Icon-Double Skin Milk Shard.png |
||
| + | |number= 1 |
||
| + | |fontsize= 1.5em |
||
| + | |tooltip=Double Skin Milk Shard |
||
| + | }} |
||
| + | | |
||
| + | |{{ItemCount |
||
| + | |width= 65px |
||
| + | |img= Icon-Spectra Blade.png |
||
| + | |number= 1 |
||
| + | |fontsize= 1.5em |
||
| + | |tooltip=Spectra Blade |
||
| + | }} |
||
| + | | rowspan="3" |{{Popup|text=[[File:Icon-Skin-Pineapple Bun-Homebody Lifestyle.png|65px]]|inline=1|popup=Pineapple Bun's Homebody Lifestyle Skin<br/>[[File:Skin-Pineapple Bun-Homebody Lifestyle.png|250px]]}} |
||
| + | |- |
||
| + | |Normal |
||
| + | |{{ItemCount |
||
| + | |width= 65px |
||
| + | |img= Icon-Beginner Seasoning.png |
||
| + | |number= 5 |
||
| + | |fontsize= 1.5em |
||
| + | |tooltip=Beginner Seasoning |
||
| + | }} |
||
| + | |{{ItemCount |
||
| + | |width= 65px |
||
| + | |img= Icon-Gold.png |
||
| + | |number= 5,000 |
||
| + | |fontsize= 1.3em |
||
| + | |tooltip=Gold |
||
| + | }} |
||
| + | |{{ItemCount |
||
| + | |width= 65px |
||
| + | |img= Icon-Cooking Power.png |
||
| + | |number= 200 |
||
| + | |fontsize= 1.5em |
||
| + | |tooltip=Cooking Power |
||
| + | }} |
||
| + | |{{ItemCount |
||
| + | |width= 65px |
||
| + | |img= Icon-Double Skin Milk Shard.png |
||
| + | |number= 2 |
||
| + | |fontsize= 1.5em |
||
| + | |tooltip=Double Skin Milk Shard |
||
| + | }} |
||
| + | | |
||
| + | |{{ItemCount |
||
| + | |width= 65px |
||
| + | |img= Icon-Spectra Blade.png |
||
| + | |number= 2 |
||
| + | |fontsize= 1.5em |
||
| + | |tooltip=Spectra Blade |
||
| + | }} |
||
| + | |- |
||
| + | |Hard |
||
| + | |{{ItemCount |
||
| + | |width= 65px |
||
| + | |img= Icon-Beginner Seasoning.png |
||
| + | |number= 8 |
||
| + | |fontsize= 1.5em |
||
| + | |tooltip=Beginner Seasoning |
||
| + | }} |
||
| + | |{{ItemCount |
||
| + | |width= 65px |
||
| + | |img= Icon-Gold.png |
||
| + | |number= 10,000 |
||
| + | |fontsize= 1.3em |
||
| + | |tooltip=Gold |
||
| + | }} |
||
| + | |{{ItemCount |
||
| + | |width= 65px |
||
| + | |img= Icon-Cooking Power.png |
||
| + | |number= 300 |
||
| + | |fontsize= 1.5em |
||
| + | |tooltip=Cooking Power |
||
| + | }} |
||
| + | |{{ItemCount |
||
| + | |width= 65px |
||
| + | |img= Icon-Hardtack Shard.png |
||
| + | |number= 1 |
||
| + | |fontsize= 1.5em |
||
| + | |tooltip=Hardtack Shard |
||
| + | }} |
||
| + | |{{ItemCount |
||
| + | |width= 65px |
||
| + | |number= 1 |
||
| + | |fontsize= 1.5em |
||
| + | |tooltip=Dragon's Beard Candy Shard |
||
| + | }} |
||
| + | |{{ItemCount |
||
| + | |width= 65px |
||
| + | |img= Icon-Spectra Blade.png |
||
| + | |number= 3 |
||
| + | |fontsize= 1.5em |
||
| + | |tooltip=Spectra Blade |
||
| + | }} |
||
| + | |} |
||
| + | |||
| + | ==='''Bone Knight'''=== |
||
| + | {| class="themedtable" style="width: 100%; text-align:center" |
||
| + | !Difficulty |
||
| + | ! colspan="5" |Normal Rewards (Random 1 out of 4) |
||
| + | !Bonus |
||
| + | !Rare |
||
| + | |- |
||
| + | |Easy |
||
| + | |{{ItemCount |
||
| + | |width= 65px |
||
| + | |img= Icon-Beginner Seasoning.png |
||
| + | |number= 3 |
||
| + | |fontsize= 1.5em |
||
| + | |tooltip=Beginner Seasoning |
||
| + | }} |
||
| + | |{{ItemCount |
||
| + | |width= 65px |
||
| + | |img= Icon-Gold.png |
||
| + | |number= 3,000 |
||
| + | |fontsize= 1.3em |
||
| + | |tooltip=Gold |
||
| + | }} |
||
| + | |{{ItemCount |
||
| + | |width= 65px |
||
| + | |img= Icon-Cooking Power.png |
||
| + | |number= 150 |
||
| + | |fontsize= 1.5em |
||
| + | |tooltip=Cooking Power |
||
| + | }} |
||
| + | |{{ItemCount |
||
| + | |width= 65px |
||
| + | |img= Icon-Instant Noodles Shard.png |
||
| + | |number= 1 |
||
| + | |fontsize= 1.5em |
||
| + | |tooltip=Instant Noodles Shard |
||
| + | }} |
||
| + | | |
||
| + | |{{ItemCount |
||
| + | |width= 65px |
||
| + | |img= Icon-Bluestone (Team Up).png |
||
| + | |number= 1 |
||
| + | |fontsize= 1.5em |
||
| + | |tooltip=Bluestone (Team Up) |
||
| + | }} |
||
| + | | rowspan="3" |{{Popup|text=[[File:Icon-Skin-Escargot-Soothing Time.png|65px]]|inline=1|popup=Escargot's Soothing Time Skin<br/>[[File:Skin-Escargot-Soothing Time.png|250px]]}} |
||
| + | |- |
||
| + | |Normal |
||
| + | |{{ItemCount |
||
| + | |width= 65px |
||
| + | |img= Icon-Beginner Seasoning.png |
||
| + | |number= 5 |
||
| + | |fontsize= 1.5em |
||
| + | |tooltip=Beginner Seasoning |
||
| + | }} |
||
| + | |{{ItemCount |
||
| + | |width= 65px |
||
| + | |img= Icon-Gold.png |
||
| + | |number= 5,000 |
||
| + | |fontsize= 1.3em |
||
| + | |tooltip=Gold |
||
| + | }} |
||
| + | |{{ItemCount |
||
| + | |width= 65px |
||
| + | |img= Icon-Cooking Power.png |
||
| + | |number= 200 |
||
| + | |fontsize= 1.5em |
||
| + | |tooltip=Cooking Power |
||
| + | }} |
||
| + | |{{ItemCount |
||
| + | |width= 65px |
||
| + | |img= Icon-Instant Noodles Shard.png |
||
| + | |number= 2 |
||
| + | |fontsize= 1.5em |
||
| + | |tooltip=Instant Noodles Shard |
||
| + | }} |
||
| + | | |
||
| + | |{{ItemCount |
||
| + | |width= 65px |
||
| + | |img= Icon-Bluestone (Team Up).png |
||
| + | |number= 2 |
||
| + | |fontsize= 1.5em |
||
| + | |tooltip=Bluestone (Team Up) |
||
| + | }} |
||
| + | |- |
||
| + | |Hard |
||
| + | |{{ItemCount |
||
| + | |width= 65px |
||
| + | |img= Icon-Beginner Seasoning.png |
||
| + | |number= 8 |
||
| + | |fontsize= 1.5em |
||
| + | |tooltip=Beginner Seasoning |
||
| + | }} |
||
| + | |{{ItemCount |
||
| + | |width= 65px |
||
| + | |img= Icon-Gold.png |
||
| + | |number= 10,000 |
||
| + | |fontsize= 1.3em |
||
| + | |tooltip=Gold |
||
| + | }} |
||
| + | |{{ItemCount |
||
| + | |width= 65px |
||
| + | |img= Icon-Cooking Power.png |
||
| + | |number= 300 |
||
| + | |fontsize= 1.5em |
||
| + | |tooltip=Cooking Power |
||
| + | }} |
||
| + | |{{ItemCount |
||
| + | |width= 65px |
||
| + | |img= Icon-Hardtack Shard.png |
||
| + | |number= 1 |
||
| + | |fontsize= 1.5em |
||
| + | |tooltip=Hardtack Shard |
||
| + | }} |
||
| + | |{{ItemCount |
||
| + | |width= 65px |
||
| + | |number= 1 |
||
| + | |fontsize= 1.5em |
||
| + | |tooltip=Dragon's Beard Candy Shard |
||
| + | }} |
||
| + | |{{ItemCount |
||
| + | |width= 65px |
||
| + | |img= Icon-Bluestone (Team Up).png |
||
| + | |number= 3 |
||
| + | |fontsize= 1.5em |
||
| + | |tooltip=Bluestone (Team Up) |
||
| + | }} |
||
| + | |} |
||
| + | ==='''Orochi'''=== |
||
| + | {| class="themedtable" style="width: 100%; text-align:center" |
||
| + | !Difficulty |
||
| + | ! colspan="5" |Normal Rewards (Random 1 out of 4) |
||
| + | !Bonus |
||
| + | !Rare |
||
| + | |- |
||
| + | |Easy |
||
| + | |{{ItemCount |
||
| + | |width= 65px |
||
| + | |img= Icon-Beginner Seasoning.png |
||
| + | |number= 3 |
||
| + | |fontsize= 1.5em |
||
| + | |tooltip=Beginner Seasoning |
||
| + | }} |
||
| + | |{{ItemCount |
||
| + | |width= 65px |
||
| + | |img= Icon-Gold.png |
||
| + | |number= 3,000 |
||
| + | |fontsize= 1.3em |
||
| + | |tooltip=Gold |
||
| + | }} |
||
| + | |{{ItemCount |
||
| + | |width= 65px |
||
| + | |img= Icon-Cooking Power.png |
||
| + | |number= 150 |
||
| + | |fontsize= 1.5em |
||
| + | |tooltip=Cooking Power |
||
| + | }} |
||
| + | |{{ItemCount |
||
| + | |width= 65px |
||
| + | |img= Icon-Yellow Pea Cake Shard.png |
||
| + | |number= 1 |
||
| + | |fontsize= 1.5em |
||
| + | |tooltip=Yellow Pea Cake Shard |
||
| + | }} |
||
| + | | |
||
| + | |{{ItemCount |
||
| + | |width= 65px |
||
| + | |img= Icon-Mask (Team Up).png |
||
| + | |number= 1 |
||
| + | |fontsize= 1.5em |
||
| + | |tooltip=Mask (Team Up) |
||
| + | }} |
||
| + | | rowspan="3" |{{Popup|text=[[File:Icon-Skin-Unadon-All in Sight.png|65px]]|inline=1|popup=Unadon's All in Sight Skin<br/>[[File:Skin-Unadon-All in Sight.png|250px]]}} |
||
| + | |- |
||
| + | |Normal |
||
| + | |{{ItemCount |
||
| + | |width= 65px |
||
| + | |img= Icon-Beginner Seasoning.png |
||
| + | |number= 5 |
||
| + | |fontsize= 1.5em |
||
| + | |tooltip=Beginner Seasoning |
||
| + | }} |
||
| + | |{{ItemCount |
||
| + | |width= 65px |
||
| + | |img= Icon-Gold.png |
||
| + | |number= 5,000 |
||
| + | |fontsize= 1.3em |
||
| + | |tooltip=Gold |
||
| + | }} |
||
| + | |{{ItemCount |
||
| + | |width= 65px |
||
| + | |img= Icon-Cooking Power.png |
||
| + | |number= 200 |
||
| + | |fontsize= 1.5em |
||
| + | |tooltip=Cooking Power |
||
| + | }} |
||
| + | |{{ItemCount |
||
| + | |width= 65px |
||
| + | |img= Icon-Yellow Pea Cake Shard.png |
||
| + | |number= 2 |
||
| + | |fontsize= 1.5em |
||
| + | |tooltip=Yellow Pea Cake Shard |
||
| + | }} |
||
| + | | |
||
| + | |{{ItemCount |
||
| + | |width= 65px |
||
| + | |img= Icon-Mask (Team Up).png |
||
| + | |number= 2 |
||
| + | |fontsize= 1.5em |
||
| + | |tooltip=Mask (Team Up) |
||
| + | }} |
||
| + | |- |
||
| + | |Hard |
||
| + | |{{ItemCount |
||
| + | |width= 65px |
||
| + | |img= Icon-Beginner Seasoning.png |
||
| + | |number= 8 |
||
| + | |fontsize= 1.5em |
||
| + | |tooltip=Beginner Seasoning |
||
| + | }} |
||
| + | |{{ItemCount |
||
| + | |width= 65px |
||
| + | |img= Icon-Gold.png |
||
| + | |number= 10,000 |
||
| + | |fontsize= 1.3em |
||
| + | |tooltip=Gold |
||
| + | }} |
||
| + | |{{ItemCount |
||
| + | |width= 65px |
||
| + | |img= Icon-Cooking Power.png |
||
| + | |number= 300 |
||
| + | |fontsize= 1.5em |
||
| + | |tooltip=Cooking Power |
||
| + | }} |
||
| + | |{{ItemCount |
||
| + | |width= 65px |
||
| + | |img= Icon-Soft Serve Cone Shard.png |
||
| + | |number= 1 |
||
| + | |fontsize= 1.5em |
||
| + | |tooltip=Soft Serve Cone Shard |
||
| + | }} |
||
| + | |{{ItemCount |
||
| + | |width= 65px |
||
| + | |number= 1 |
||
| + | |fontsize= 1.5em |
||
| + | |tooltip=Dragon's Beard Candy Shard |
||
| + | }} |
||
| + | |{{ItemCount |
||
| + | |width= 65px |
||
| + | |img= Icon-Mask (Team Up).png |
||
| + | |number= 3 |
||
| + | |fontsize= 1.5em |
||
| + | |tooltip=Mask (Team Up) |
||
| + | }} |
||
| + | |} |
||
| + | [[Category:Trials]] |
||
Revision as of 05:20, 9 October 2020

Team Up is a daily co-op Trial which unlocks at Player Level 30. Players pair up to defeat Enhanced Fallen Angels to win Supplies, Food Soul Shards and Skins.
Team Up is refreshed at midnight UTC. Tap the "Trials" Icon to enter the "Team Up" screen.
Battling
You select which Fallen Angel you want to battle and the difficulty level (easy, normal or hard). There are currently 10 available enemies:
- Uke Mochi (Unlocks at Lv 30)
- Aizen (Unlocks at Lv 40)
- Tsuchigumo (Unlocks at Lv 50)
- Thundaruda (Unlocks at Lv 60)
- Leaf Ocean Queen (Unlocks at Lv 60)
- Uke Mochi (Enhanced) (Unlocks at Lv 80)
- Inugami (Unlocks at Lv 80)
- Spectra (Unlocks at Lv 80)
- Bone Knight (Unlocks at Lv 80)
- Orochi (Unlocks at Lv 80)
The only enemy you will be facing is the boss itself; it won't have any minions.
The time limit for each battle is 10 minutes.
You have 10 daily challenge opportunities. You can buy 5 extra chances for 10 Magic Crystals, or 10 extra chances if you are subscribed to the monthly pass.
Teams
Each team has 5 Food Souls selected by the 2 players out of their respective roster. A solo mode is also an option where one player uses only 3 Food Souls. One player, the leader, selects three while the other player selects two. The first Food Soul selected by the leading player will be the team captain. Players cannot select the same Food Soul.
If you select "Match", you will either create a new room, or join a room that has not been locked.
If you wish to play with a friend,
Creating a room
- Select the boss and difficulty you want to play.
- Check the "Password" box.
- Set a password and tap "Create". (You can choose not to set a password as well)
- Once the room is created, you will see the "Team Number" in the top left corner of the screen.
- Send the Team Number and password to your friend for them to join the room.
Joining a room
If you wish to join a room,
- Enter the Team Number in the "Search for Teams" bar in the top right of the boss selection screen.
- If the Team Number is valid, you will then be prompted for the password. (Or, if no password has been set, you will directly join the room.)
If you wish to play solo, (Only available to Leaf Ocean King and easier bosses)
- Select the boss and difficult you want to play.
- Check the "Password" box.
- Set a password and tap "Create". (You can choose not to set a password as well)
- Once the room is created, add your desired food souls to the 3 open slots.
- Once all 3 food souls are selected, the "Start" button will light up.
Rewards
There are 3 types of rewards: Normal, Rare and Bonus.
- A normal reward is a random one out of 4 possible rewards. You automatically get it when you defeat the Fallen Angel.
- A rare rewards is a rare skin for a Food Soul. They are not part of normal rewards and a special screen will pop up alerting you of acquiring a Skin.
- A bonus reward is one or several unique tokens matching the type of Fallen Angel you have defeated. You automatically get these when you defeat the Fallen Angel. You can accumulate them to get special avatars and frames.
You can still play for Rare and Bonus rewards after all Normal reward chances have been consumed.
Normal and bonus rewards scale with difficulty but a higher difficulty level does not increase the drop rate of rare rewards.
Collecting 1000 bonus rewards to get a frame and 4000 bonus rewards to get an avatar. After collecting 4000 bonus items the stages will no longer drop that associated bonus item.
In Hard levels, Bamboo Rice or Dragon's Beard Candy shards can occasionally replace one of the 4 possible Normal Rewards.
Uke Mochi
| Difficulty | Normal Rewards (Random 1 out of 4) | Bonus | Rare | ||||
|---|---|---|---|---|---|---|---|
| Easy |
1
|
2,000
|
100
|
1
|
1
|
||
| Normal |
2
|
3,000
|
150
|
2
|
2
| ||
| Hard |
3
|
5,000
|
200
|
1
|
1
|
3
| |

Aizen
| Difficulty | Normal Rewards (Random 1 out of 4) | Bonus | Rare | ||||
|---|---|---|---|---|---|---|---|
| Easy |
1
|
2,000
|
100
|
1
|
1
|
||
| Normal |
2
|
3,000
|
150
|
2
|
2
| ||
| Hard |
3
|
5,000
|
200
|
1
|
1
|
3
| |

Tsuchigumo
| Difficulty | Normal Rewards (Random 1 out of 4) | Bonus | Rare | ||||
|---|---|---|---|---|---|---|---|
| Easy |
1
|
2,000
|
100
|
1
|
1
|
||
| Normal |
2
|
3,000
|
150
|
2
|
2
| ||
| Hard |
2
|
5,000
|
200
|
1
|
1
|
3
| |

Thundaruda
| Difficulty | Normal Rewards (Random 1 out of 4) | Bonus | Rare | ||||
|---|---|---|---|---|---|---|---|
| Easy |
3
|
3,000
|
150
|
1
|
1
|
||
| Normal |
5
|
5,000
|
200
|
2
|
2
| ||
| Hard |
8
|
10,000
|
300
|
1
|
1
|
3
| |

Leaf Ocean Queen
| Difficulty | Normal Rewards (Random 1 out of 4) | Bonus | Rare | ||||
|---|---|---|---|---|---|---|---|
| Easy |
3
|
3,000
|
150
|
1
|
1
|
||
| Normal |
5
|
5,000
|
200
|
2
|
2
| ||
| Hard |
8
|
10,000
|
300
|
1
|
1
|
3
| |

Uke Mochi (Enhanced)
| Difficulty | Normal Rewards (Random 1 out of 4) | Bonus | Rare | ||||
|---|---|---|---|---|---|---|---|
| Easy |
3
|
3,000
|
150
|
1
|
1
|
||
| Normal |
5
|
5,000
|
200
|
2
|
2
| ||
| Hard |
8
|
10,000
|
300
|
1
|
1
|
3
| |
Inugami
| Difficulty | Normal Rewards (Random 1 out of 4) | Bonus | Rare | ||||
|---|---|---|---|---|---|---|---|
| Easy |
3
|
3,000
|
150
|
1
|
1
|
||
| Normal |
5
|
5,000
|
200
|
2
|
2
| ||
| Hard |
8
|
10,000
|
300
|
1
|
1
|
3
| |

Spectra
| Difficulty | Normal Rewards (Random 1 out of 4) | Bonus | Rare | ||||
|---|---|---|---|---|---|---|---|
| Easy |
3
|
3,000
|
150
|
1
|
1
|
||
| Normal |
5
|
5,000
|
200
|
2
|
2
| ||
| Hard |
8
|
10,000
|
300
|
1
|
1
|
3
| |

Bone Knight
| Difficulty | Normal Rewards (Random 1 out of 4) | Bonus | Rare | ||||
|---|---|---|---|---|---|---|---|
| Easy |
3
|
3,000
|
150
|
1
|
1
|
||
| Normal |
5
|
5,000
|
200
|
2
|
2
| ||
| Hard |
8
|
10,000
|
300
|
1
|
1
|
3
| |

Orochi
| Difficulty | Normal Rewards (Random 1 out of 4) | Bonus | Rare | ||||
|---|---|---|---|---|---|---|---|
| Easy |
3
|
3,000
|
150
|
1
|
|||
| Normal |
5
|
5,000
|
200
|
2
| |||
| Hard |
8
|
10,000
|
300
|
1
|
1
|
3
| |
